Orchids have a reputation for being fussy, but repotting is one of those things that gets easier the moment you know what to look for. Most orchids are not asking for a bigger home. They are asking for fresh air around the roots, a mix that drains well, and a pot that does not stay soggy.
Below is a practical way to tell when to repot, how to do it without snapping every root, and what to do afterward so your plant settles in fast.
Quick note on scope: This guide is written for the common epiphytic orchids many people grow indoors (especially Phalaenopsis, plus similar types like Cattleya and Oncidium) that live in airy bark or moss. Terrestrial orchids like Cymbidium and Paphiopedilum often prefer finer, more moisture-retentive mixes and a slightly different approach.
The easiest signs your orchid needs repotting
You do not need a calendar reminder. Your orchid will tell you. Here are the signs I trust most, especially for common houseplant orchids like Phalaenopsis (moth orchid).
1) The potting mix is breaking down
Orchid bark and moss do not last forever. When they decompose, they hold water longer and reduce airflow. That is when roots start to struggle.
- Bark looks dark and crumbly, more like mulch than chunky pieces.
- Moss feels packed and stays wet for days.
- You notice a sour, swampy smell from the pot. Think stale, decaying, low-oxygen “composty” odor, not earthy.
2) Watering has become weird
If you water the same way you always have but the plant dries much faster or stays wet much longer, it often means the mix has changed, not your skills.
- Too fast: water runs straight through and the plant wilts quickly after.
- Too slow: the pot stays heavy and damp for a long time.
3) Roots are overcrowded or escaping
Orchid roots like to wander, so a few aerial roots are normal. The problem is when the pot is basically all roots and almost no mix left to support moisture and stability.
- Lots of roots circling tightly inside the pot.
- The plant wobbles because it cannot anchor well.
- The pot is bulging or the orchid is pushing itself upward.
4) You see root trouble
Healthy orchid roots are usually firm and plump. Depending on the species they can look silvery when dry and green when wet.
- Rot: roots are brown or black, mushy, and the outer layer slides off.
- Dead roots: hollow, papery, and brittle.
If the plant is declining and you suspect root issues, repotting is not just optional. It is often the fix.
Best time of year to repot orchids
The best timing depends on what your orchid is doing.
Repot after blooming, when new growth starts
For many common home orchids, a great window is after flowers fade and you see fresh root tips or a new leaf starting. The plant is naturally shifting into growth mode and will recover faster.
Avoid repotting in full bloom if you can
Repotting while the orchid is flowering is not guaranteed to fail, but it often shortens the bloom time because the plant is stressed. If your only issue is “it looks crowded,” wait.
Flower spike question: You usually do not have to cut the spike just to repot. If it is awkward or getting snapped in the process, it is fine to stake it, or trim it and let the plant put that energy into roots.
Repot right away if the mix smells sour or roots are rotting
If you smell decay, see mushy roots, or the pot stays wet too long, do not wait for the perfect season. Rot moves faster than your schedule.
How often should you repot?
As a rule of thumb, orchids in bark mix need repotting every 1 to 2 years. In sphagnum moss, it is often about yearly because moss compacts and holds water.
That said, some growers comfortably go 2 to 3 years in bark if the pieces stay chunky, airy, and sweet-smelling.
What matters most is the condition of the media and how your setup behaves.
- Frequent watering: media tends to break down faster and compact sooner.
- Heavy fertilizer use or hard water: mineral buildup is a good reason to refresh the mix.
- Cooler or lower light homes: pots dry slower, so you may not need repotting sooner because of breakdown, but you may benefit from fresher, chunkier media to keep airflow high and reduce the risk of staying wet too long.
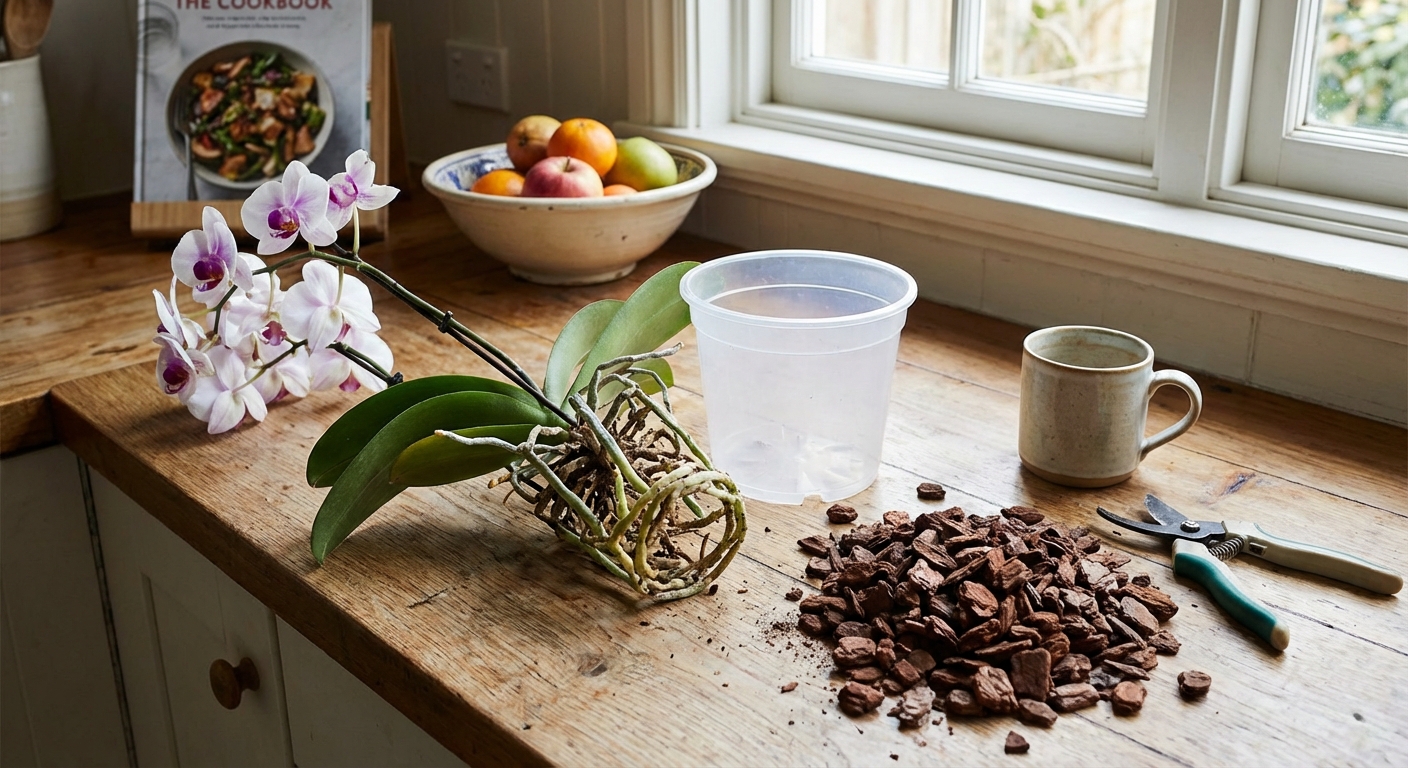
What you need before you start
Repotting goes smoother when you set up first. Here is the basic kit.
- New pot: same size is usually fine. Orchids like to be snug.
- Orchid mix: bark-based is the easiest for most beginners.
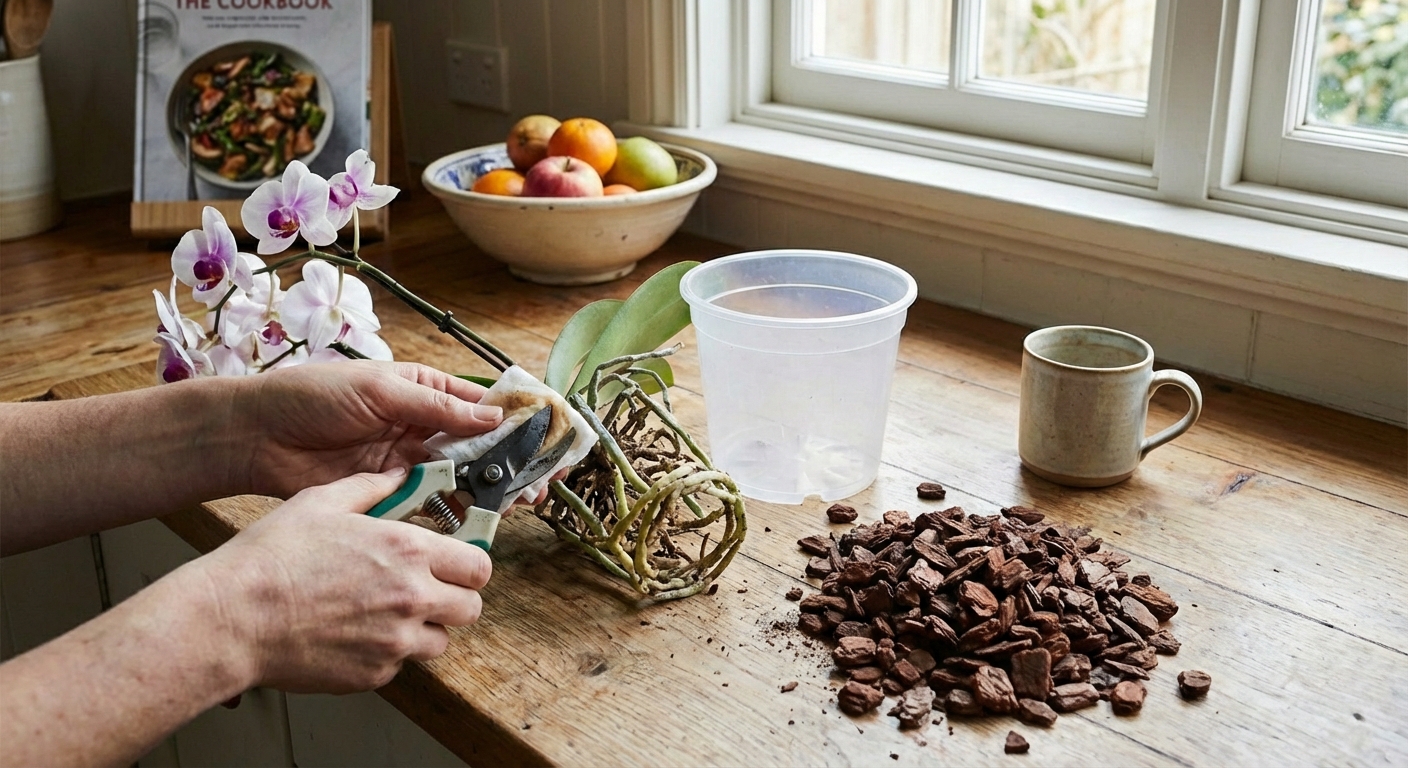
- Clean snips or scissors: disinfected.
- Optional: stake and clips for stability.
Hygiene tip: Disinfect cutting tools between plants so you do not spread disease. If you only have one orchid, still clean your tools before you start.
If you can, use a pot with lots of drainage and airflow. Clear plastic pots are great for Phalaenopsis because you can actually see what the roots are doing.
If you use cinnamon, use it sparingly and only on a cut to the plant’s base tissue (not on roots). It can be too drying for roots and can slow recovery if misused.
Step-by-step: the easy way to repot an orchid
1) Water the orchid lightly first
Slightly damp roots are more flexible and less likely to snap. If the plant is bone dry, give it a small drink a few hours before repotting.
2) Remove the orchid from its pot
Squeeze a plastic pot to loosen roots. If roots are stuck, work slowly around the edge. Do not yank from the leaves.
3) Remove old mix and inspect roots
Pick away old bark or moss gently. You do not need every last speck off, but you want most of the old stuff gone so you can see what is healthy.
4) Trim only what is dead or rotting
Cut mushy, blackened, or hollow roots back to firm tissue. Keep anything that is firm, even if it looks a little stained. Stained is not the same as rotten.
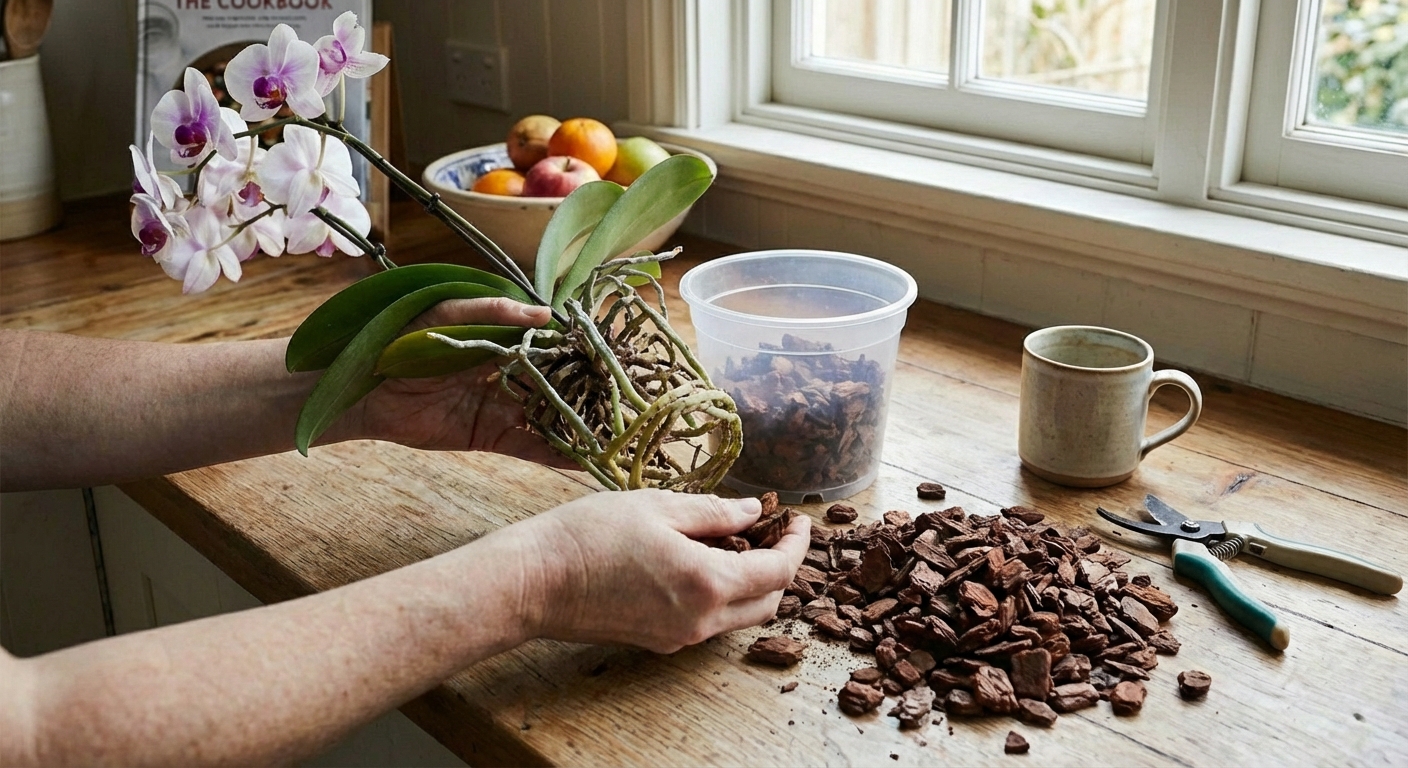
5) Choose the right pot size
In most cases, go with a pot that fits the root mass with a little room for mix. Upsizing too much is a common mistake because extra empty space holds moisture and slows drying.
6) Position the plant and add mix
Hold the orchid so the base sits just above the mix line. Fill with bark, tapping the pot to settle pieces around roots. Do not pack it like soil. The goal is support plus air gaps.
Do not bury the crown: For Phalaenopsis, keep the crown (where leaves meet) above the mix so water does not sit there and cause rot.
Aerial roots: If an aerial root does not want to bend into the pot, do not force it. Let it stay out.
7) Stabilize if needed
If the plant wobbles, use a stake and a clip for a few weeks. A steady orchid makes new roots faster.
Choosing the right orchid potting mix
This is where a lot of orchid problems start. Regular potting soil is a no for most epiphytic orchids because it stays too wet and blocks air.
Bark mix (beginner-friendly)
- Dries at a reasonable pace.
- Good airflow for roots.
- Easier to avoid overwatering.
Sphagnum moss (use carefully)
- Great for very dry homes and thirsty growers.
- Easy to overwater because it can stay wet a long time.
- Needs regular replacement because it compacts.
Blends and add-ins
Charcoal, perlite, and pumice can increase airflow and help mixes stay fresher. If you tend to overwater, a chunkier, faster-draining blend is usually your friend.
Aftercare: what to do right after repotting
The first couple weeks are about helping the orchid re-root, not forcing growth.
Watering after repotting
If you trimmed a lot of roots, you can wait 2 to 3 days before watering to let cuts dry slightly. If you did minimal trimming, you can water the next day. Either way, avoid keeping the mix constantly wet.
Also, try to keep water out of the crown (especially for Phalaenopsis). If water collects there, blot it out with a tissue.
Light and temperature
- Keep it in bright, indirect light.
- Avoid hot direct sun for a week or two while it adjusts.
- Stable indoor temps help recovery.
Hold fertilizer for a bit
Skip fertilizer for about 2 to 4 weeks, especially if you had root rot. Once you see new root tips or steady new leaf growth, you can restart at a low dose.
Common repotting mistakes that cause setbacks
- Going up a pot size too fast: more wet mix around fewer roots.
- Packing the mix tight: suffocates roots and holds water.
- Using potting soil: almost always leads to root decline.
- Cutting healthy roots: orchids need roots to recover from stress.
- Repotting repeatedly: pick a plan, then give the plant time.
Quick checklist: should you repot today?
- The mix smells sour or the pot stays wet too long.
- Bark is crumbly or moss is compacted.
- Roots are rotting or mostly dead.
- The plant is unstable and the pot is packed with roots.
- You are done flowering and see new roots starting.
If you hit two or more of those, repotting is usually the right move. Keep it simple, keep it clean, and remember: orchids do not need perfection. They need airflow, drainage, and consistent care.

Jose Brito
I’m Jose Britto, the writer behind Green Beans N More. I share practical, down-to-earth gardening advice for home growers—whether you’re starting your first raised bed, troubleshooting pests, improving soil, or figuring out what to plant next. My focus is simple: clear tips you can actually use, realistic expectations, and methods that work in real backyards (not just in perfect conditions). If you like straightforward guidance and learning as you go, you’re in the right place.