Orchid repotting gets a bad reputation because people treat orchids like houseplants. They are not. Most common orchids sold in clear pots, especially phalaenopsis, want air around their roots, quick drainage, and a pot that fits the root system, not the leaves.
Repotting is not about giving your orchid “fresh soil.” It is about restoring airflow, preventing rot, and giving new roots a clean, stable place to grow. Done right, repotting is one of the best things you can do for long-term health and flowering.
Quick note: This guide is for epiphytic orchids (those that grow on trees in nature) like phalaenopsis, cattleya, and many oncidium types. Terrestrial orchids (like many cymbidiums, paphiopedilums, and jewel orchids) often want different media and moisture levels, so do not assume bark-only care fits them.
When it is safe to repot
Timing matters because orchids grow in cycles. You will get the smoothest recovery when your orchid is ready to make fresh roots.
Best time for most orchids
- Right after blooming finishes and you see new root tips starting. That is your best cue.
- Spring through early summer is usually easiest because light and warmth support new roots.
Repot now if you see these red flags
- Potting mix breaking down and looking compact or sponge-like. Common signs include lots of fine particles, darkened bark, and a sour smell.
- Roots staying wet for days after watering.
- Black, mushy roots or visible rot at the base.
- Pests in the pot or around the base, like fungus gnat larvae, or mealybugs hiding near the crown and leaf joints.
- Plant wobble because the old mix collapsed and no longer holds the roots steady.
Even if the orchid is in bloom, you can repot in an emergency, like active rot. Saving roots comes before saving flowers.
How often to repot
Most epiphytic orchids in bark do best with a refresh every 1 to 2 years. In warm, humid homes or with frequent watering, bark can break down faster, so you might repot sooner. If your mix still smells clean, drains fast, and the roots dry at a normal pace, you can often wait.
Facts that prevent repotting mistakes
Fact 1: Bigger pots slow orchids down
Orchids generally prefer a snug fit. An oversized pot holds extra moisture and reduces airflow, which is an easy path to rot.
Fact 2: Healthy orchid roots can look weird
Silver or pale roots are often normal when dry. When watered, many turn green. Do not trim roots just because they look wrinkled or aerial.
Fact 3: Potting mix is a tool, not a decoration
Choose mix based on your home conditions. If your home is humid, you can use a chunkier mix. If your air is dry or you forget to water, you can use a slightly more moisture-holding mix.
Fact 4: “Root shock” has a few common causes
After repotting, orchids struggle most commonly because the new setup stays too wet, or the plant is loose and roots cannot attach. It can also happen from mechanical root damage, big temperature swings, very low humidity, or severe root loss. Stability, gentle conditions, and good airflow solve a lot.
Pick the right pot and mix
Pot choices
- Clear plastic pot (great for phalaenopsis): lets you monitor roots and moisture. Choose one with lots of side and bottom holes.
- Slotted orchid pot: excellent airflow, dries faster.
- Terracotta: dries faster and can be helpful if you tend to overwater, but salts can build up and roots can cling to the pot.
Size rule: usually 1 pot size up at most, or keep the same size if the root mass still fits.
Mix choices for common orchids
- Phalaenopsis: medium bark with a little sphagnum or coco chips if your home is dry.
- Cattleya: chunky bark, very airy, minimal fine material.
- Oncidium types: medium bark with slightly more moisture retention than cattleya, depending on your environment.
Avoid regular potting soil for epiphytic orchids. Orchid roots need air. Soil stays dense and causes fast decline.
Safe repotting step by step
What you need
- New pot and fresh orchid mix
- Clean scissors or pruners
- Rubbing alcohol or flame for sterilizing tools
- Optional: cinnamon powder for cut surfaces on roots only (use very sparingly, many growers skip it because it can be overly drying)
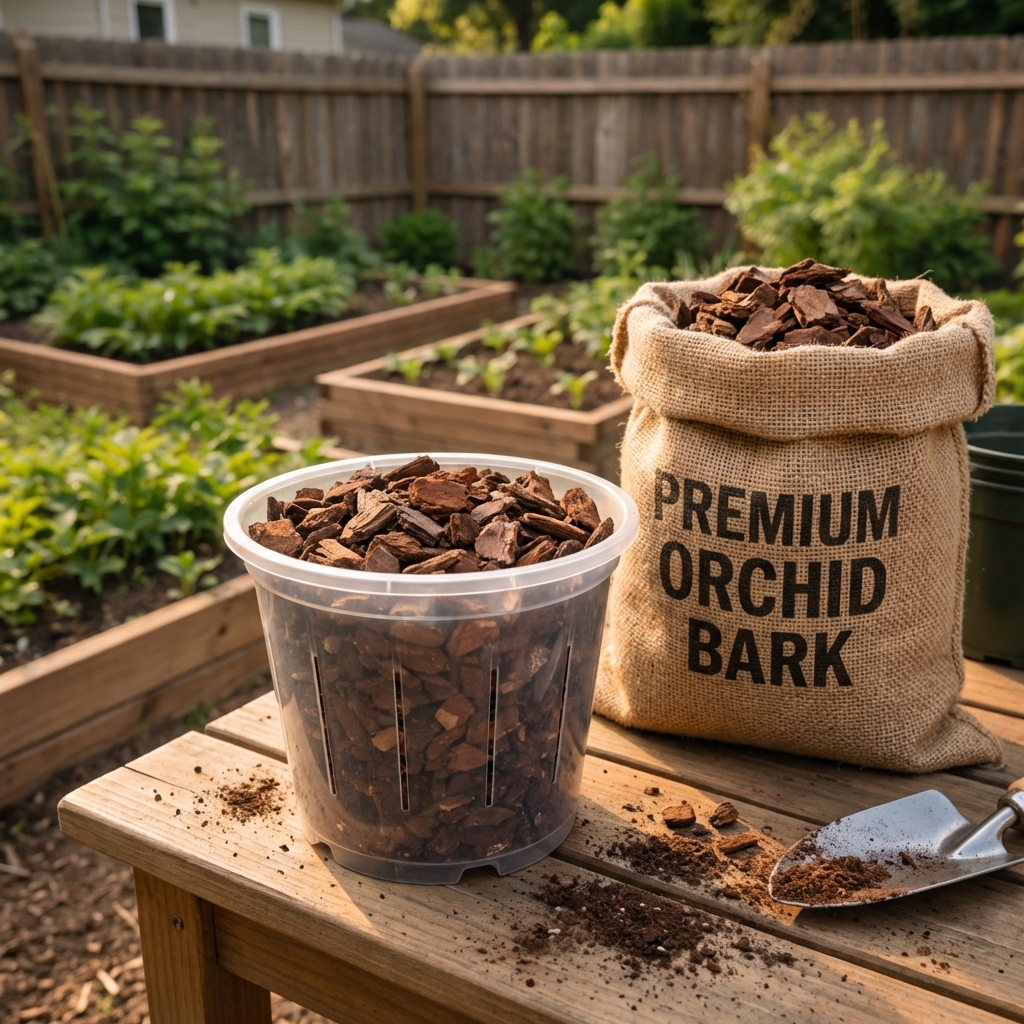
Prep the mix
If you are using bark, a quick rinse helps remove dust. Many people also soak bark for 15 to 30 minutes so it hydrates evenly and does not repel water the first few times you water.
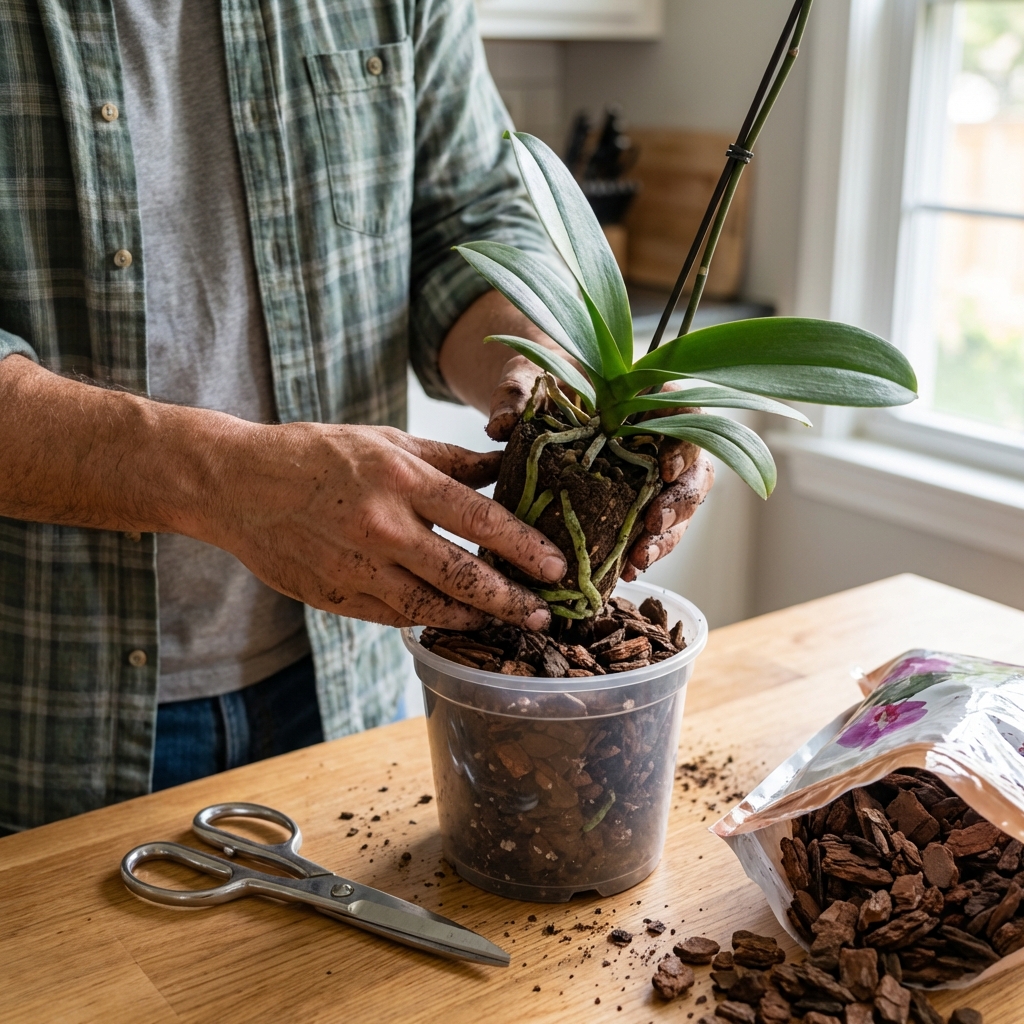
1) Soak first, then remove
Water the orchid 30 to 60 minutes before repotting. Hydrated roots are more flexible and less likely to snap.
Gently squeeze the pot, tilt, and slide the plant out. If roots are stuck to a pot, do not yank. Cut the pot if it is plastic, or soak longer if needed.
2) Remove old mix completely
Pick out old bark and moss from between roots. This is slow work, but it matters. Old broken-down mix is where problems start.
3) Trim only what is truly dead
- Healthy roots: firm, wiry, white to silver when dry, green when wet.
- Dead roots: mushy, hollow, papery, black, or the outer layer slides off leaving a string.
Sterilize your tool before and after trimming. This reduces spread of rot and disease.
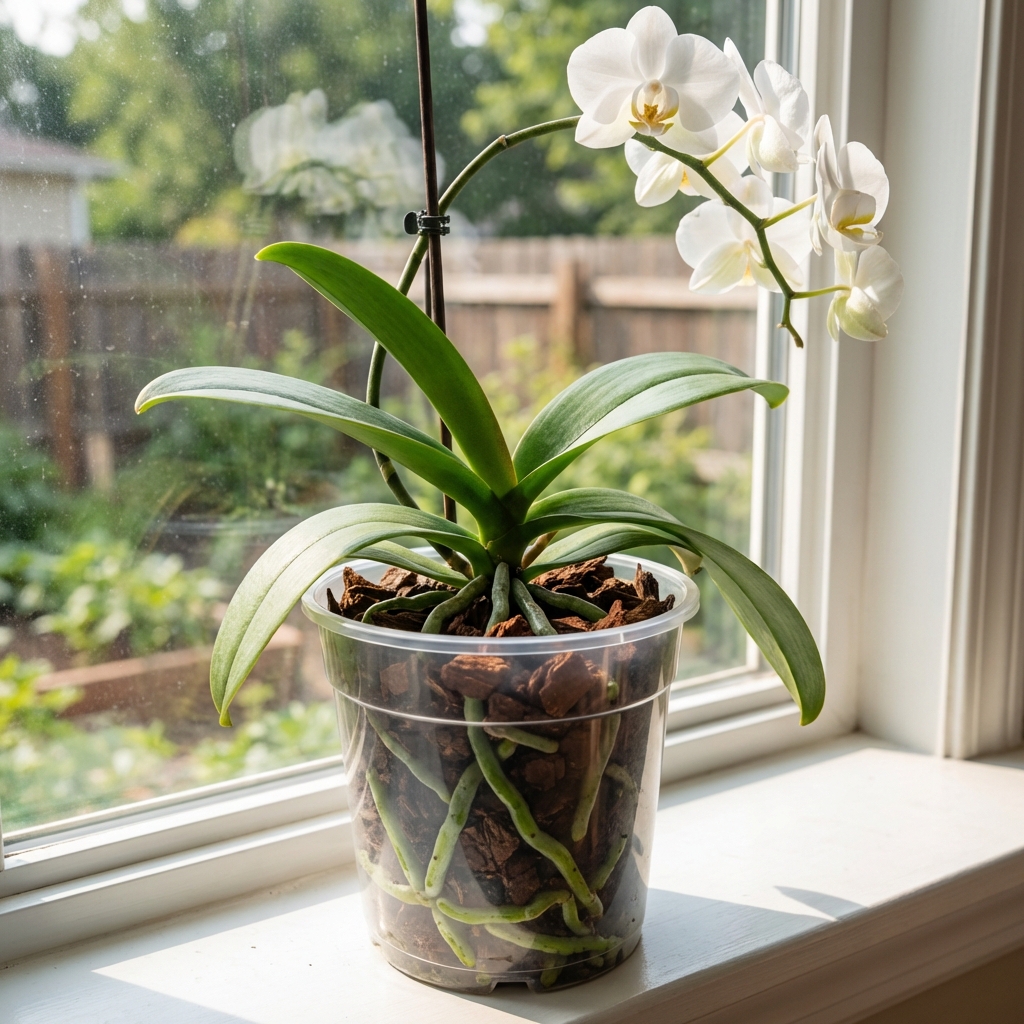
4) Position the orchid correctly
For phalaenopsis, keep the crown above the mix. Do not bury it. Burying the crown invites crown rot.
Set the plant so the base sits just above the mix line, with roots directed down and around naturally. A few aerial roots can stay out. That is normal.
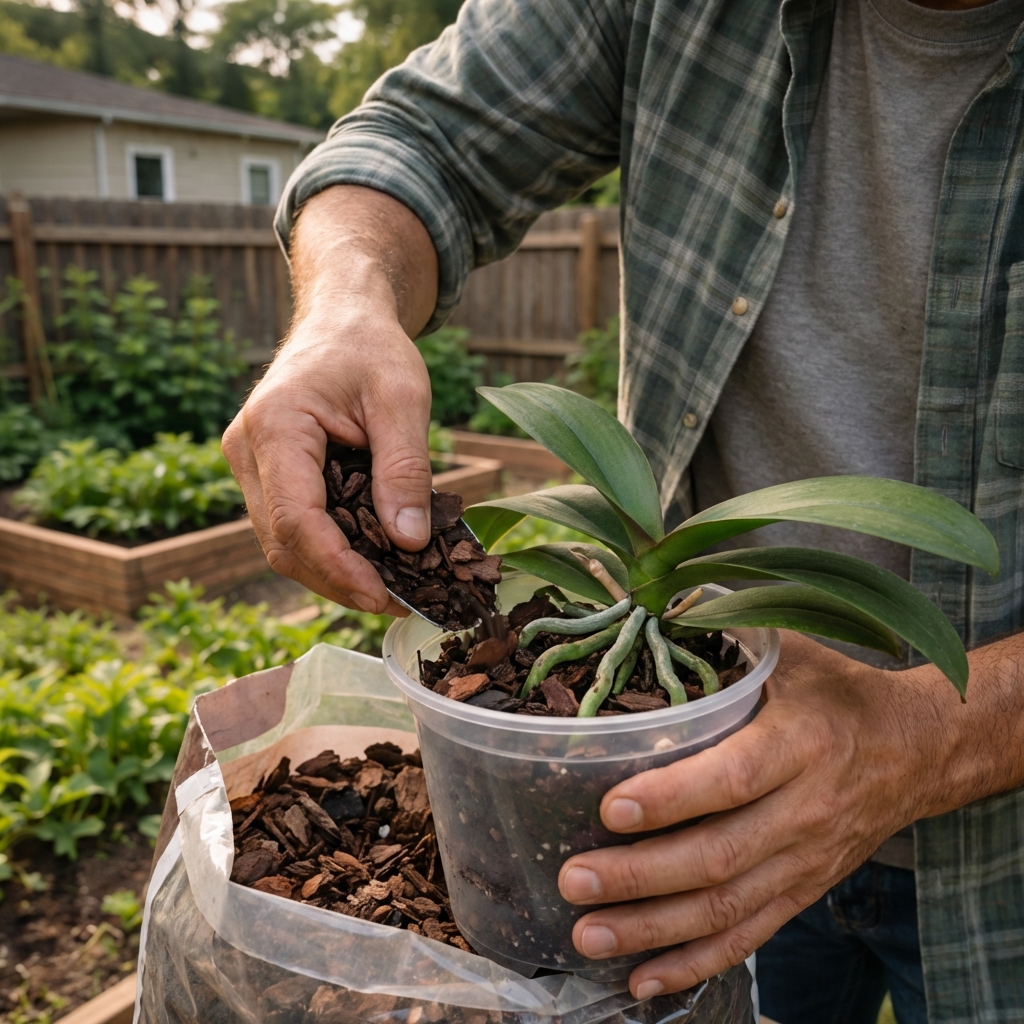
5) Add mix and stabilize
Fill around roots with bark. Tap the pot to settle pieces. Do not pack it tight like soil, but do fill enough so the plant does not rock.
If the plant is unstable, use a simple stake or a rhizome clip until new roots grab the mix.
Aftercare that prevents setbacks
Watering after repotting
If you had to cut many rotted roots, it often helps to wait 1 to 3 days before watering so cuts can dry slightly, especially in warm or humid conditions. If your mix is bone-dry and your home is dry, you can lightly moisten the mix instead of fully watering. If you did minimal trimming, you can water lightly right away.
Then water based on the new pot and mix, not on your old schedule. Fresh bark often drains faster. A tighter pot may dry slower. Watch the roots and the weight of the pot.
Also: do not let the pot sit in standing water inside a decorative outer cachepot. Drain it fully every time.
Light and temperature
- Keep it in bright, indirect light.
- Avoid hot midday sun for 1 to 2 weeks while it settles.
- Stable warm temps help new roots start faster.
Fertilizer
Hold fertilizer for about 2 weeks after repotting, then resume at a low dose. New roots are sensitive, and it is easy to overdo it.
Solutions to common repotting problems
Problem: Leaves get wrinkled after repotting
Most likely cause: the plant lost root function, roots were damaged, or roots are not yet established in the new mix.
Fix:
- Check moisture. Keep the mix slightly moist, not soggy.
- Increase humidity around the plant with a humidity tray or grouping plants, not by misting the crown.
- Make sure the plant is stable. Wobble slows rooting.
Problem: Roots look dry and silvery all the time
Most likely cause: mix is too chunky for your environment, or airflow is high and humidity is low.
Fix:
- Add a small amount of sphagnum mixed through the bark, not a tight plug.
- Water more thoroughly, letting water run through for 20 to 30 seconds, then drain well.
Problem: Roots are turning brown or black in the new pot
Most likely cause: staying too wet, poor airflow, or the crown got water trapped.
Fix:
- Switch to a more ventilated pot or chunkier mix.
- Water less often and ensure full drainage.
- Keep the crown dry. Tilt the plant slightly if water collects there.
Problem: Orchid is wobbly and will not anchor
Most likely cause: pot too large, mix too chunky, or roots are mostly aerial.
Fix:
- Downsize the pot if needed.
- Use a stake to stop movement.
- Fill in around roots so the base is supported, without burying the crown.
Problem: No growth for months after repotting
Most likely cause: wrong season, low light, cooler temperatures, or the plant is rebuilding roots quietly.
Fix:
- Increase light gradually to bright indirect conditions.
- Check nighttime temps. Many orchids slow down when nights are too cool.
- Inspect roots through the pot. If roots are firm, patience is part of the solution.
Orchid repotting safety checklist
- Use a pot with strong drainage and airflow
- Choose a mix that matches your watering habits and humidity
- Rinse or soak bark if it is very dry or dusty
- Trim only dead roots with sterilized tools
- Keep the crown above the mix
- Stabilize the plant so new roots can grab
- Adjust watering to the new setup, not your old routine
- Do not leave the inner pot sitting in water inside an outer cachepot
If you want one takeaway, it is this: orchids do best when their roots can breathe. Repotting is successful when you restore air, improve drainage, and keep the plant steady while it grows new roots.

Jose Brito
I’m Jose Britto, the writer behind Green Beans N More. I share practical, down-to-earth gardening advice for home growers—whether you’re starting your first raised bed, troubleshooting pests, improving soil, or figuring out what to plant next. My focus is simple: clear tips you can actually use, realistic expectations, and methods that work in real backyards (not just in perfect conditions). If you like straightforward guidance and learning as you go, you’re in the right place.