When an orchid finishes blooming, it is not “done.” It is shifting energy from flowers back into roots and leaves. This is the moment when small, consistent care makes the biggest difference. Below are quick, organic-friendly tips you can follow at home, even if your orchid lives on a windowsill that is not perfect.

First, identify your orchid
Most grocery store and gift orchids are Phalaenopsis (moth orchids). The spike-cutting tips below are mainly for Phals. Other orchids have different “rules,” so when in doubt, stick to light, water, and root health and avoid aggressive cutting.
- Phalaenopsis (most common): Broad, thick leaves, blooms last a long time, usually one main spike.
- Dendrobium: Canes (tall stems) with leaves along them, may bloom from nodes. Do not cut green canes just because flowers finished.
- Cattleya: Thicker pseudobulbs, often one or two leathery leaves per bulb, fragrant blooms. Do not cut green pseudobulbs.
If you are not sure what you have, skip spike experiments and focus on healthy roots, bright indirect light, and consistent watering.
Quick after-bloom checklist
- Remove old flowers and check the spike color.
- Inspect roots through the pot and smell the mix.
- Adjust watering to match light, temperature, and root activity.
- Give bright, indirect light and steady temps.
- Feed lightly with gentle, organic-leaning options.
- Hold off on repotting unless the mix is breaking down or the plant is unstable.
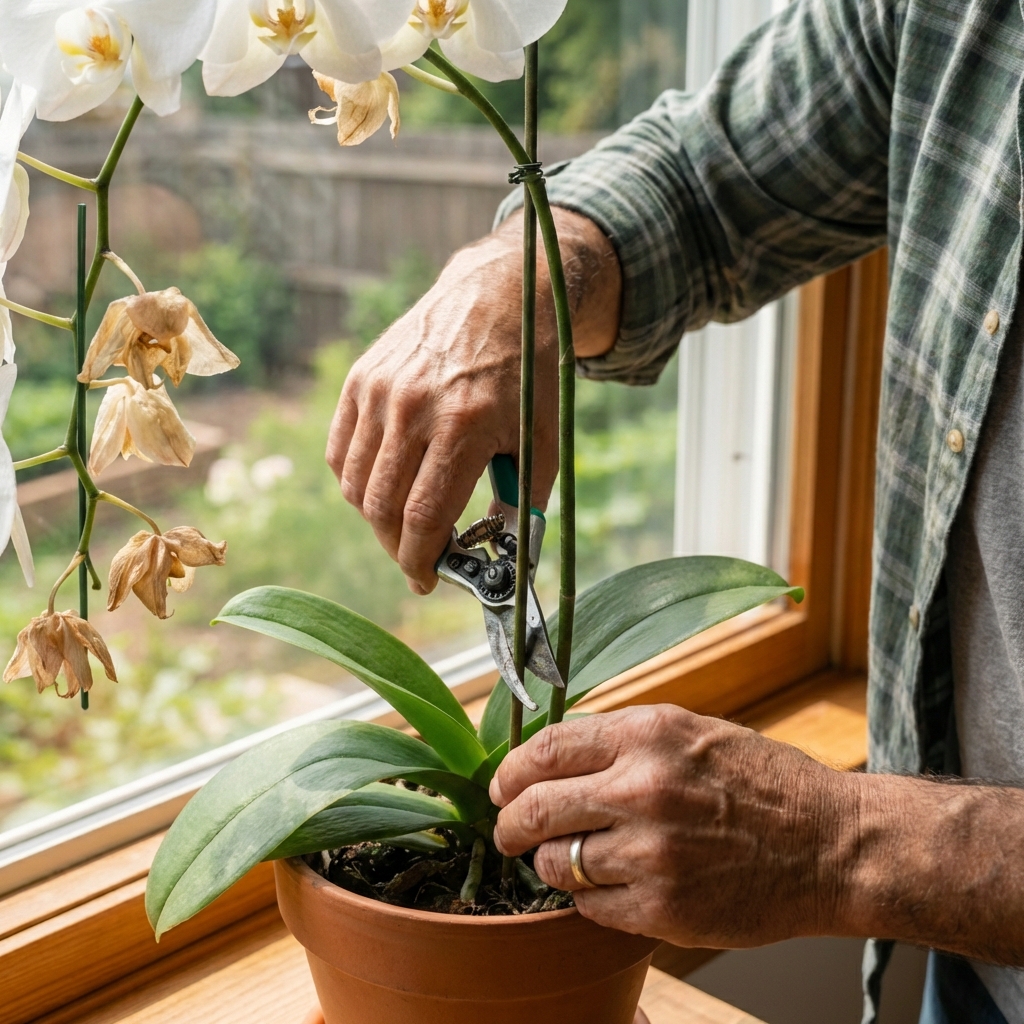
What to do with the flower spike
This is where most people get stuck. With Phalaenopsis, the “right” cut depends on your goal and how strong the plant looks.
If the spike is green
You have three reasonable choices:
- Option A: Leave it. Sometimes Phalaenopsis will branch and rebloom from a green spike. This can be nice, but the next flowers are often smaller and the plant may stay in “bloom mode” instead of building strength.
- Option B: The middle-ground node cut (for a quicker tidy rebloom). If your plant is healthy and you want to try for a secondary spike, cut the green spike just above the second or third node (the little bump) from the bottom. Leave a small bit of stem above that node. This often triggers a side branch, but it is not guaranteed.
- Option C: Cut it near the base to encourage rest. If your orchid looks tired, has weak roots, or dropped blooms early, it is usually better to let it recharge. Cut the spike near the base, leaving a 1/2 to 1 inch stub so you do not nick the crown.
If the spike is yellow or brown
That spike is finished. Cut it off near the base, leaving a short stub so you do not nick the crown.
Organic hygiene tip: Use clean snips wiped with rubbing alcohol, then let them dry. If you want to keep it simple and low-chemical, hot soapy water plus a good rinse can help, but alcohol is more reliable for disinfecting.
Root health basics
When in doubt, look at the roots. They tell you more than the calendar does.
- Healthy roots: firm, plump, and silvery when dry, green when freshly watered. Some may be white or tan and still firm. That is fine.
- Rotting roots: brown or black, mushy, hollow, or papery. They often smell “off.”
- Dehydrated roots: very wrinkled or flattened, often paired with limp or pleated leaves.
If you see mostly firm roots, your care is probably close to right.
Watering after bloom
After bloom, orchids often need a little less water in many homes, especially in winter or in lower light. But it is not a hard rule. Water needs follow light, temperature, airflow, and whether the plant is actively growing new roots.
Use these simple cues
- Roots look silvery: time to water soon.
- Roots look bright green: wait.
- Pot feels light: likely ready.
- Pot feels heavy: hold off.
How to water (easy indoor method)
- Take the orchid to the sink.
- Run lukewarm water through the pot for 20 to 30 seconds.
- Let it drain fully. No standing water in the outer cache pot.
Important: Keep water out of the crown (the center where leaves meet). If water splashes there, blot it dry. In cool rooms, avoid watering late in the day and aim for gentle airflow so the crown dries quickly.
Organic-friendly feeding
Orchids are light feeders. The biggest mistake is feeding too strong, too often. After bloom, think “steady and mild,” especially when you see new roots or leaves starting.
Good low-stress approach
- Frequency: every 2 to 4 weeks in active growth (new roots or leaves). Less in winter.
- Strength: quarter-strength is plenty for most home orchids.
- Flush monthly: run plain water through the pot to wash out buildup.
What counts as “organic” here?
True organic fertilizers can be tricky indoors because they can smell, grow mold, or break down unpredictably in bark. If you want to stay organic-leaning, look for gentle, low-odor products made for houseplants and orchids, and use them diluted.
Avoid: burying kitchen compost in orchid bark, thick fish emulsion in a low-airflow room, or heavy top-dressing. Orchids need air around roots, and rich materials can turn the pot sour fast.
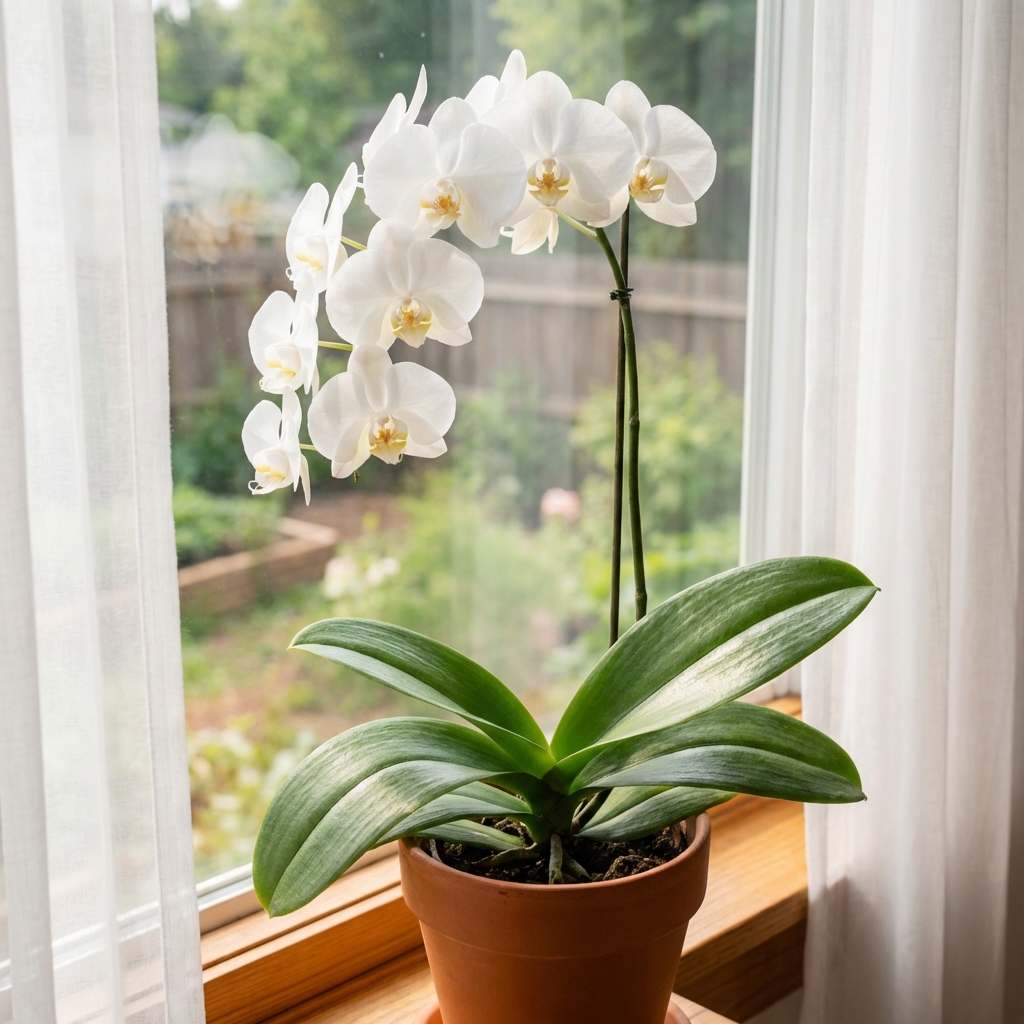
Light and temperature
After bloom, your orchid’s job is to rebuild. Bright, indirect light helps it store energy for the next spike.
- Best light: bright shade near an east window, or a few feet back from a sunny south or west window with a sheer curtain.
- Leaf color clue: medium green is ideal. Very dark green usually means it needs more light to rebloom.
- Temperature: most Phalaenopsis like 65 to 80 F days and slightly cooler nights.
Rebloom tip: Many Phals set spikes after a small drop in nighttime temperature in fall (about 5 to 10 F cooler than daytime) for a couple of weeks.
Timeline note: Reblooming is rarely fast. Many Phalaenopsis bloom about once a year in typical home conditions, and it can take months after flowering for a new spike to appear.
Humidity and airflow
Orchids like humidity, but they also need airflow so roots and leaves dry in a reasonable time.
- Pebble tray: Set the pot on a tray with pebbles and water below the pot base (the pot should not sit in water). This can help a little right around the plant, but it is usually a modest boost, not a room-wide fix.
- Group plants: A few plants together naturally raise local humidity.
- Small fan: A gentle fan across the room helps prevent fungus and keeps the crown drier.
Misting: Not necessary for most homes. If water sits on leaves in a cool room or with poor airflow, it can contribute to spotting and rot. If you mist, do it lightly in the morning only and keep water out of the crown.
Repotting after bloom
After bloom is a common time to repot, but only if the plant needs it. Repotting is stress, so do it with a reason.
Repot if you notice any of these
- The potting mix smells sour or stays wet too long.
- Bark is breaking down into fine particles.
- Roots are rotting (mushy, hollow, or foul-smelling), or the root system is failing.
- The plant is physically unstable or wobbles because the pot no longer supports it.
Do not repot just because roots look crowded
Phalaenopsis often like “tight shoes.” Lots of roots in the pot, even circling roots, can be normal. If the mix is still chunky and the plant is stable with firm roots, you can usually wait.
Skip repotting if
- Roots look firm and green or silvery.
- The mix is still chunky and airy.
- The orchid is pushing a new spike and seems stable.
Organic potting tip: Use fresh, chunky orchid bark (often fir bark). Many mixes include charcoal and perlite. That is fine. The key is air space and fast drainage.
Common problems after bloom
Wrinkled leaves
- Likely cause: root issues or inconsistent watering.
- Fix: check roots, adjust watering rhythm, and ensure the pot drains fully.
Yellowing bottom leaf
- Likely cause: normal aging if it is just one older leaf.
- Fix: let it yellow and drop on its own. Multiple yellow leaves can mean overwatering or low light.
No rebloom for a long time
- Likely cause: not enough light, no cool-night trigger, or weak roots.
- Fix: increase bright indirect light, try cooler nights in fall, and feed lightly during growth.
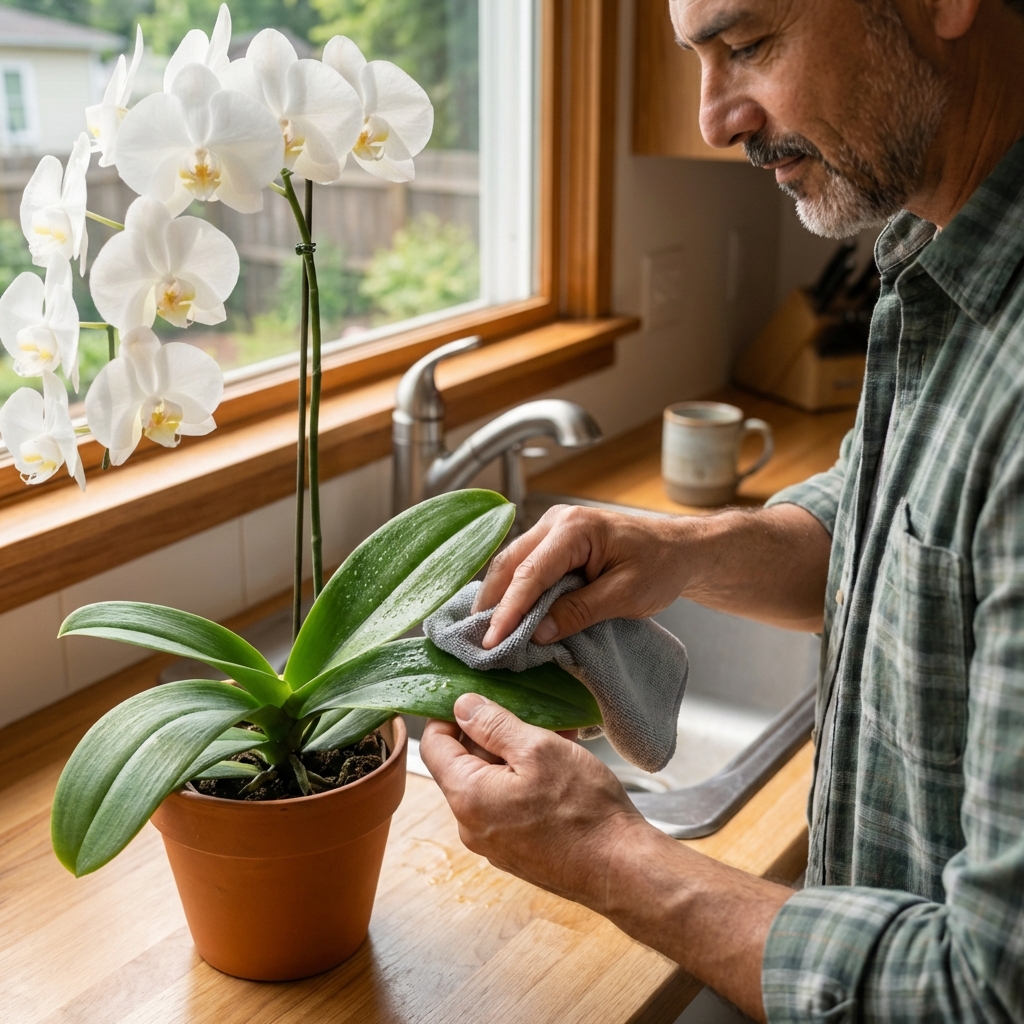
Sticky leaves
- Likely cause: sap from flowers, or pests like scale.
- Fix: wipe leaves with a damp cloth and inspect closely. If you see bumps or cottony spots, isolate the plant and treat with insecticidal soap or horticultural oil, following label directions.
Simple routine
If you want the shortest possible plan, here it is.
- Weekly: check roots and pot weight, water only when close to dry.
- Every 2 to 4 weeks: light feeding during active growth.
- Monthly: flush with plain water.
- Seasonally: aim for brighter light, and try cooler nights in fall to trigger spikes.
Orchids reward patience. If your plant looks healthy but is not blooming yet, that is still progress. Strong roots and firm leaves come first. Flowers follow.

Jose Brito
I’m Jose Britto, the writer behind Green Beans N More. I share practical, down-to-earth gardening advice for home growers—whether you’re starting your first raised bed, troubleshooting pests, improving soil, or figuring out what to plant next. My focus is simple: clear tips you can actually use, realistic expectations, and methods that work in real backyards (not just in perfect conditions). If you like straightforward guidance and learning as you go, you’re in the right place.