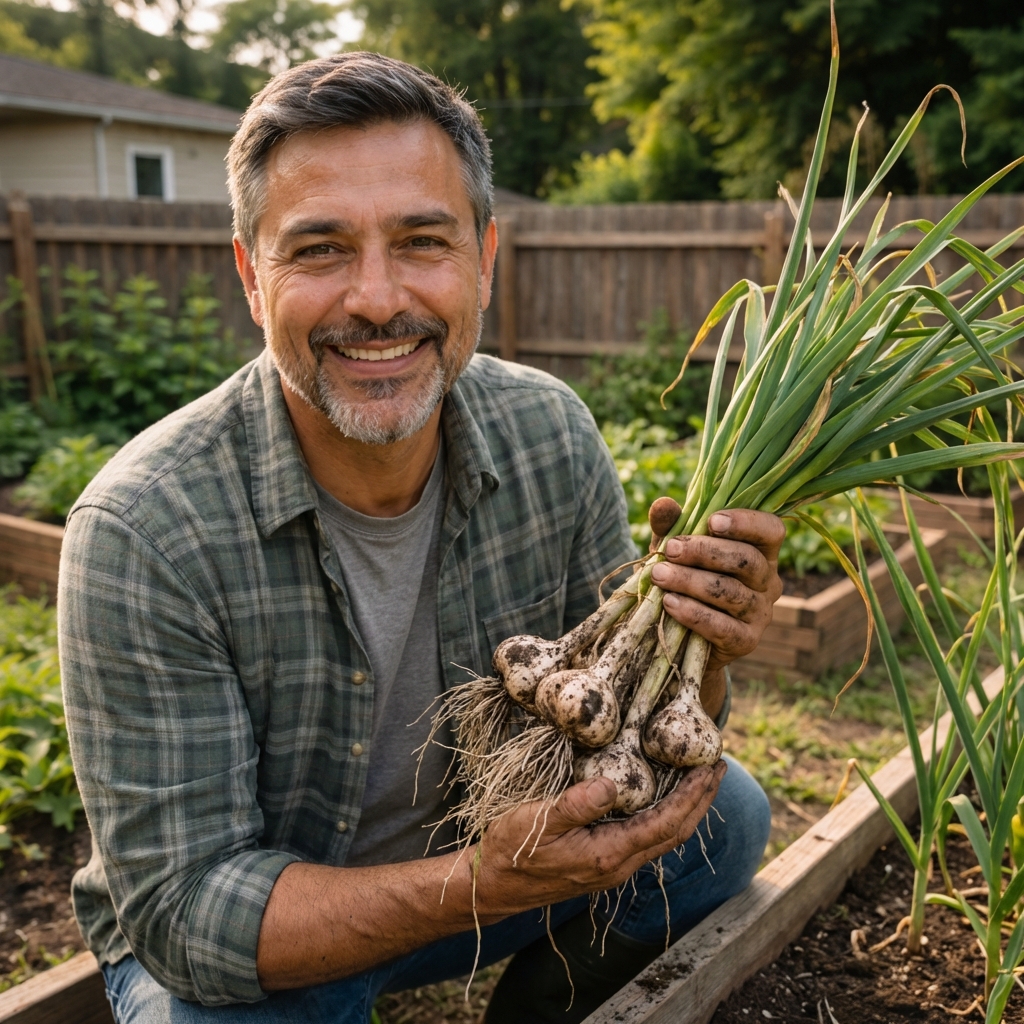
Garlic is one of those crops that feels almost too easy once you get the rhythm. You plant individual cloves, let them ride through cool weather, and months later you pull up full bulbs that store for weeks or even months. The trick is doing a few small things right: start with good cloves, plant at the right time, keep soil healthy, and handle pests early using natural methods.
Pick the right garlic to plant
You can plant grocery store garlic sometimes, but it is hit-or-miss. Store bulbs may be treated to slow sprouting, may not be well matched to your climate, and can carry diseases you do not want to introduce to your garden. For the best results, buy “seed garlic” from a garden center, farm stand, or a reputable online seller, ideally one that offers varieties known to do well in your region.
Hardneck vs softneck
- Hardneck garlic: Best for colder winters and areas with a reliable winter chill. Makes a flower stalk called a scape. Often has big cloves and great flavor, but usually stores a little shorter.
- Softneck garlic: Better for mild winters and warm regions. No scapes. Usually stores longer and is the type you see braided.
Choose the biggest cloves
Garlic size starts with clove size. Use the largest, healthiest outer cloves from each bulb. Skip tiny interior cloves for planting and use them in the kitchen instead.
When to plant garlic cloves
Garlic wants cool weather to build roots before winter, then it bulks up when spring warms up. Planting time depends on your climate, but the goal is the same: get roots established before the ground freezes hard.
- Cold and temperate climates: Plant in fall, about 2 to 6 weeks before the ground freezes.
- Mild winter climates: Plant in late fall or winter. In very warm winter areas, softneck types are often the easiest. Hardneck types often need a cold period to form good bulbs, so you may need to chill cloves for about 4 to 8 weeks before planting if your winters stay warm.
If you are not sure, ask a local nursery when most gardeners plant garlic in your area. That local timing beats generic advice every time.
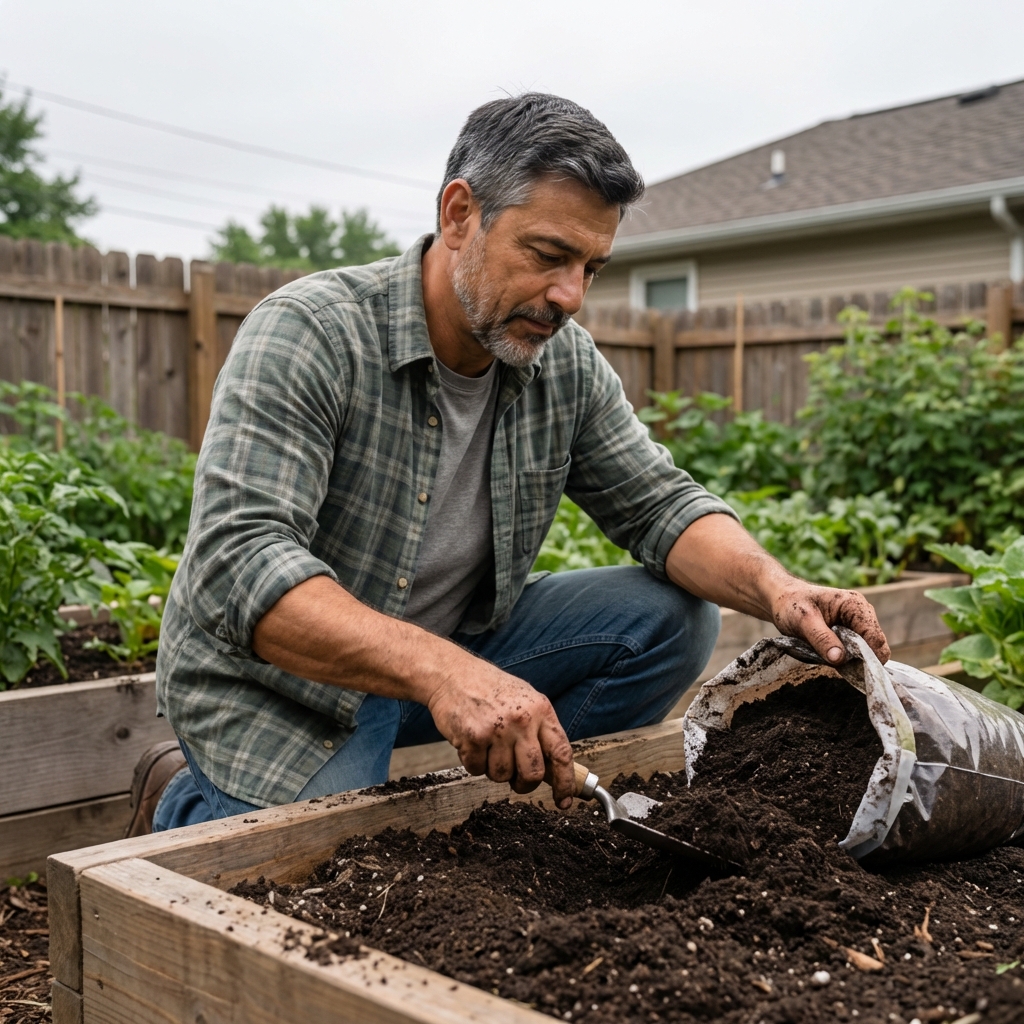
Soil prep the natural way
Garlic is a heavy feeder, but it hates soggy soil. Give it loose, fertile ground with good drainage and you are halfway there.
Best soil basics
- Texture: Loamy soil that crumbles in your hand. Raised beds are ideal if your ground stays wet.
- Drainage: If water sits after a rain, improve drainage before planting.
- pH: Garlic does best around slightly acidic to neutral soil (roughly 6.0 to 7.0).
Organic amendments that work
- Compost: Mix in a few inches before planting for steady nutrition and better structure.
- Worm castings: Great for gentle fertility and microbial life.
- Bone meal or a natural phosphorus source: Helpful at planting time for root development, especially in low-phosphorus soils.
Avoid fresh manure right before planting. It can push excess leafy growth and raise the risk of disease and rot. Well-composted manure is a different story and can be fine if it is fully broken down and worked in ahead of time.
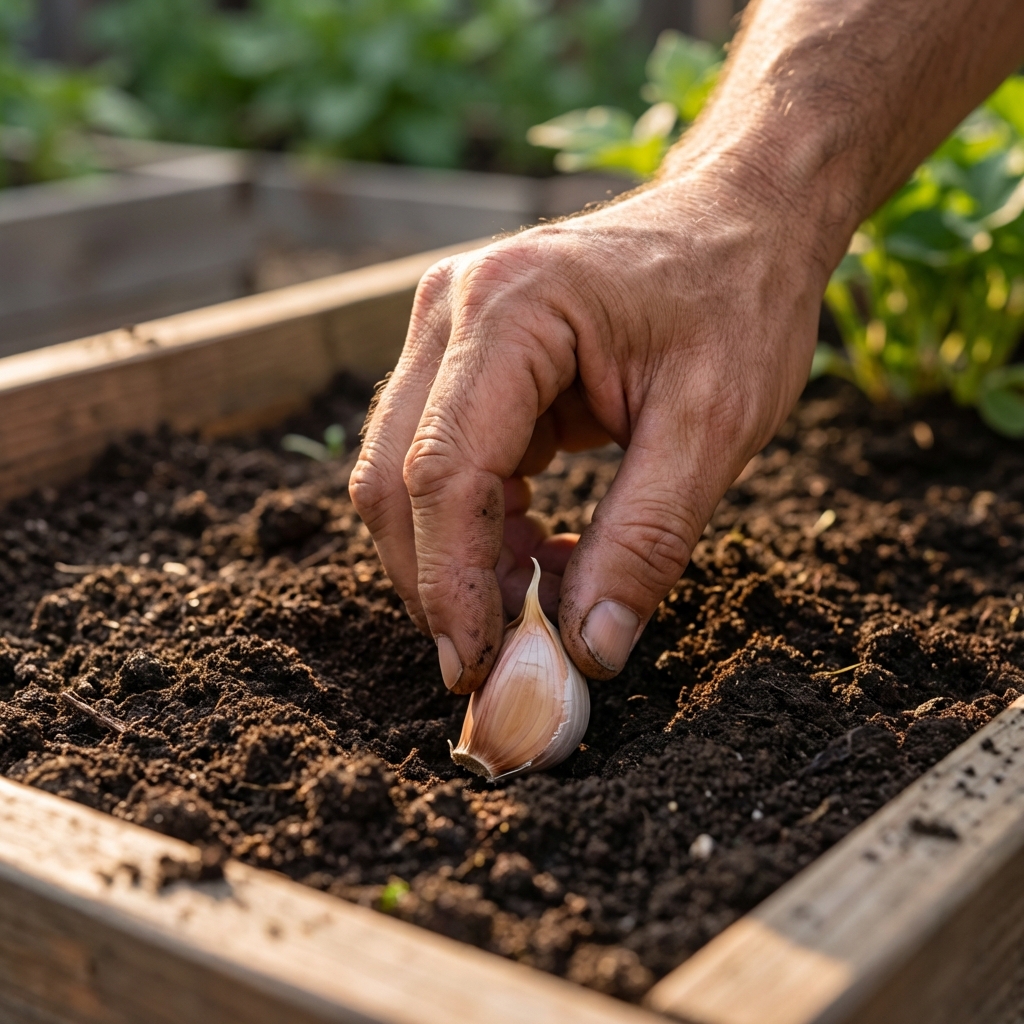
How to plant garlic cloves
Planting is simple, but spacing and depth matter more than most people think.
- Separate the bulb into individual cloves right before planting. Keep the papery skin on.
- Plant pointy side up and the flat root end down.
- Depth: Plant cloves about 2 to 3 inches deep in most gardens. In colder areas, a little deeper can help with winter heaving.
- Spacing: About 4 to 6 inches apart, with 8 to 12 inches between rows.
- Water in after planting so soil settles around the clove.
Mulch and winter care
Mulch is one of the most natural “remedies” you can give garlic. It stabilizes soil temperature, prevents weeds, and reduces how often you need to water.
Best mulches for garlic
- Clean straw (my favorite for easy spring cleanup)
- Shredded leaves (free and effective)
- Untreated grass clippings (thin layers only so they do not mat)
Apply 3 to 6 inches once the soil is cooling and temperatures stay consistently cool, often after a frost. In spring, you can pull mulch back slightly if the soil is staying too wet, but leave enough to block weeds.
Natural feeding schedule for bigger bulbs
Garlic’s main feeding window is early spring through early summer. Too much nitrogen late in the season can lead to lots of leaves but smaller bulbs.
Simple, realistic approach
- At planting: Compost plus a gentle, slow-release organic fertilizer if your soil is lean.
- Early spring: Top-dress with compost or worm castings when growth really starts.
- Spring growth phase: Optional boost with fish emulsion or alfalfa meal if leaves look pale or growth is slow.
- Stop heavy feeding: When the plant starts shifting toward bulb formation, usually as days lengthen and the base thickens.
One practical tip: if your garlic is deep green and growing steadily, do less. Over-fussing usually causes more problems than it solves.
Watering without causing rot
Garlic likes consistent moisture during active growth, but it is very sensitive to waterlogged soil. If you run into rot, drainage is usually the real fix.
- Spring: Water when the top 1 to 2 inches of soil dries out.
- Bulb sizing: Keep moisture steady. Drought stress can reduce bulb size.
- Last 2 to 3 weeks before harvest: Reduce watering so skins tighten up and bulbs cure better.
Natural remedies for common garlic problems
Most garlic problems come down to three things: too much moisture, too little airflow, or letting pests build up unchecked. Here are natural, practical fixes. One quick note: “natural” does not automatically mean risk-free, so use any spray thoughtfully and follow the label.
Fungal issues and leaf spots
If you see brown spots, yellowing, or streaking, start with the basics: avoid overhead watering and make sure plants are not crowded.
- Remove badly infected leaves and throw them in the trash, not the compost.
- Improve airflow by keeping weeds down and spacing right.
- Optional organic spray: Copper or sulfur-based products can help in wet seasons, but use them as a last step after fixing watering and crowding. Follow label directions, and avoid overusing copper since it can build up in soil over time.
Onion thrips
Thrips can make leaves look silvery or streaked. They are tiny, so look closely along the leaf folds.
- Blast with water: A firm spray can knock numbers down.
- Neem oil or insecticidal soap: Use in the evening and repeat as needed. Cover leaf folds where thrips hide, and follow the product label.
- Keep plants unstressed: Healthy garlic handles minor thrips pressure better.
Bulb rot
Rot is usually a drainage issue. Once bulbs rot, you cannot reverse it, so prevention matters.
- Fix drainage: Raised beds, adding compost for structure, and avoiding low spots help more than any spray.
- Do not overwater, especially late in the season.
- Rotate crops: Avoid planting garlic or onions in the same spot year after year.
Home remedy clove soak, when it makes sense
Some gardeners like soaking cloves before planting, especially if they have had fungal issues in the past. Keep it simple and gentle. A soak can reduce surface pathogens, but it will not fix poor soil drainage or already infected planting stock.
- Hydrogen peroxide (3%): Some gardeners do a very quick dip to clean the surface. If you try it, keep it brief, avoid long soaks (they can damage cloves), let cloves dry before planting, and consider testing a small batch first.
- Seaweed extract: Used as a soak, it can support early root growth.
Skip harsh mixes. If a clove is soft, moldy, or smells off, the best remedy is not planting it.
Scapes, timing, and when to harvest
If you are growing hardneck garlic, you will get scapes in late spring or early summer. Cutting them helps the plant put more energy into the bulb.
When to cut scapes
Snip when the scape makes one full curl, while it is still tender. Eat them like mild garlic. They are great grilled or chopped into stir-fries.
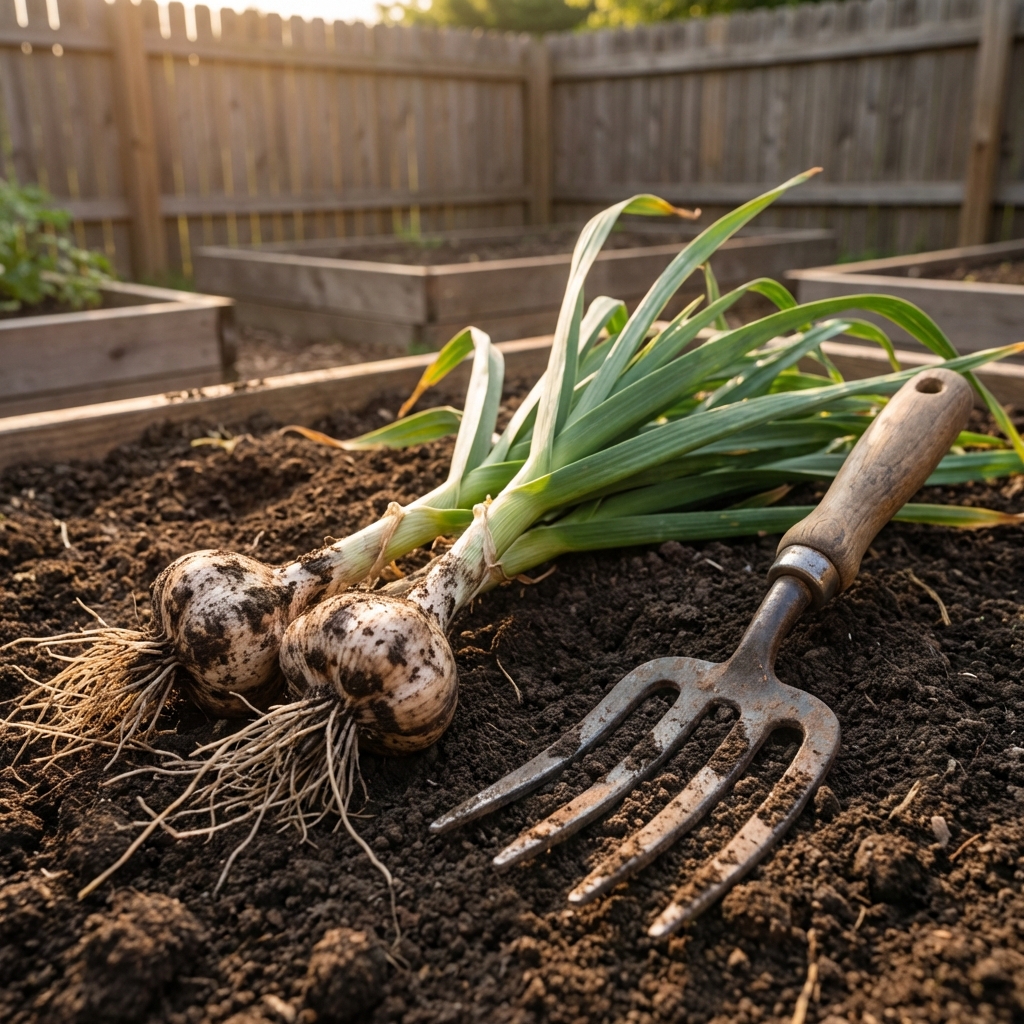
When to harvest garlic
Harvest timing is everything for good storage. Pull too early and bulbs are small. Pull too late and the wrapper skins split.
- Harvest when the lower leaves are brown and the upper leaves are still mostly green, often when about one-third to one-half of the leaves have browned.
- Loosen soil with a fork and lift bulbs gently. Do not yank by the tops.
Curing and storing naturally
Curing is simply drying garlic the right way so it stores well. This step matters as much as growing it.
How to cure
- Brush off loose dirt, but do not wash bulbs.
- Keep leaves and roots attached while curing.
- Hang bundles or lay garlic on a rack in a dry, shaded spot with good airflow.
- Cure for 2 to 4 weeks, depending on humidity.
How to store
- After curing, trim roots and cut stems to your preferred length.
- Store in a cool, dark, dry place with airflow. A cool room or pantry is ideal, roughly in the 50 to 60°F range if you can manage it.
- Avoid sealed plastic containers. Also avoid the refrigerator for long-term storage since cold temps can trigger sprouting later when bulbs warm back up.
- Softneck generally stores longer than hardneck.
Quick troubleshooting
- Lots of leaves, small bulbs: Too much nitrogen late, too much shade, or cloves planted too close.
- Yellow leaves early: Underfeeding, poor drainage, or cold stress. Check soil moisture first.
- Splitting bulbs: Harvested too late or heavy watering near harvest.
- Weak sprouting: Cloves were too small, damaged, not suited to your climate, or planting stock was low quality.
Simple garlic success plan
If you only remember a few things, make it these:
- Start with good seed garlic and big cloves (local, climate-adapted varieties help).
- Plant at the right time for your area and mulch when the weather turns consistently cool.
- Prioritize drainage and steady moisture.
- Feed lightly in spring, then back off as bulbs form.
- Harvest at the right leaf stage and cure in shade with airflow.
Do those basics, and you will be surprised how reliable garlic can be, even in a regular backyard bed.

Jose Brito
I’m Jose Britto, the writer behind Green Beans N More. I share practical, down-to-earth gardening advice for home growers—whether you’re starting your first raised bed, troubleshooting pests, improving soil, or figuring out what to plant next. My focus is simple: clear tips you can actually use, realistic expectations, and methods that work in real backyards (not just in perfect conditions). If you like straightforward guidance and learning as you go, you’re in the right place.