Dilly beans are one of the most satisfying ways to preserve a big green bean harvest. They are like dill pickles, but made with green beans instead of cucumbers. You get that snappy crunch, garlicky dill flavor, and a jar you can pull out all winter for snacks, charcuterie boards, Bloody Marys, or a quick side.
This recipe is written for real home kitchens and real backyard harvests. No fancy equipment beyond basic canning tools, and no guessing on safety basics.
What to know before you start
Pickled beans are an acidified (pickled) vegetable, so you need the right vinegar strength and a tested processing method for shelf-stable jars. Here is the straightforward version:
- Use 5% acidity vinegar (standard white distilled vinegar or cider vinegar labeled 5%).
- Do not change the vinegar to water ratio in the brine for canning. You can safely adjust dry spices, garlic, dill, and heat.
- Water bath canning is the standard method for dilly beans.
- Use pint jars for this timing. Do not switch to quarts unless you are following a tested quart process.
- For best crunch, start with very fresh beans and do not over-process.
Source note: The canning approach here follows the tested style used by USDA/NCHFP and reputable canning publishers for pickled vegetables: 5% vinegar, a 1:1 vinegar to water brine, pint jars, and boiling water processing with altitude adjustments. If you follow a different tested recipe, use that recipe’s processing time.
Dilly beans ingredients (tested brine ratio)
This makes about 4 pint jars (give or take depending on bean size and how tightly you pack). Plan on roughly 2 to 3 pounds total of fresh green beans for 4 pints.
For the brine
- 2 1/2 cups 5% vinegar (white distilled for a bright, clean pickle or apple cider for a mellower flavor)
- 2 1/2 cups water
- 1/4 cup pickling salt (or 4 tablespoons)
Salt note: Salt is for flavor and texture, not safety in vinegar pickles. Pickling salt is easiest because it dissolves cleanly and keeps brine clear. If you use kosher salt, use a brand with no anti-caking agents and measure by weight if possible since grain size varies.
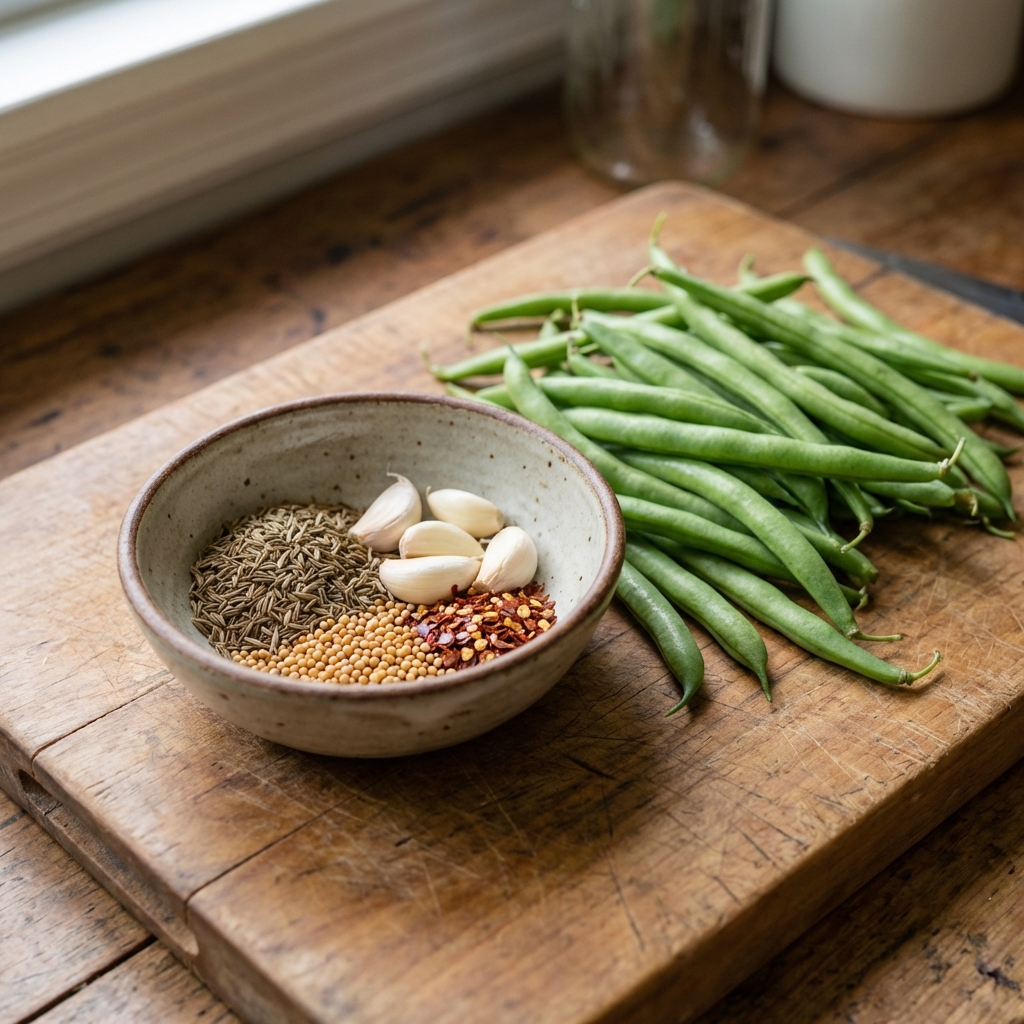
For each pint jar
- 1 to 2 cloves garlic
- 1 teaspoon dill seed or 1 large fresh dill head (or a few sprigs)
- 1/2 teaspoon mustard seed (optional but classic)
- 1/8 to 1/4 teaspoon red pepper flakes (optional, for heat)
- Green beans, trimmed and cut to fit pint jars (usually about 4 to 5 inches long, depending on your jar shape)
Equipment checklist
- 4 pint canning jars with lids and rings
- Water bath canner or a deep pot with a rack
- Jar lifter and canning funnel (highly recommended)
- Clean towel, bubble remover or chopstick, and a small saucepan for brine
Step-by-step: how to make dilly beans
This is a raw pack method: hot jars, raw beans, hot brine, then process.
1) Prep your beans
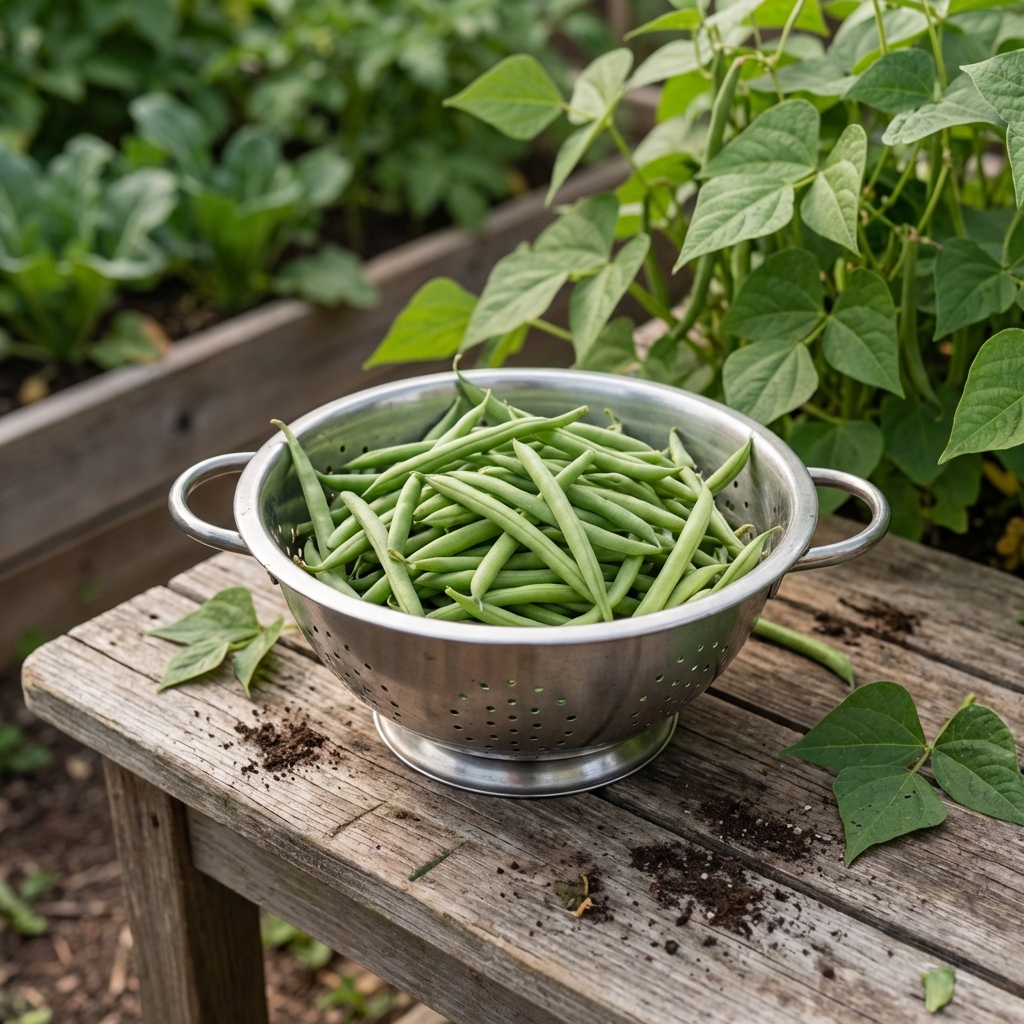
Wash green beans well. Trim stem ends. Leave them whole for the classic look, but cut them to fit your pint jars. A good target is about 1/2 inch below the rim so the beans do not poke up into the headspace (often 4 to 5 inches long).
Crunch tip: Use beans picked within 24 hours if you can. Older beans can still pickle, but they tend to go soft.
2) Heat the canner and prep jars and lids
To avoid overflow from water displacement, start by filling your water bath canner about halfway (or to roughly 6 inches deep). Bring it to a simmer while you prep everything else.
Wash jars, rings, and lids. Keep jars hot until you pack them. Lids should be prepared according to the manufacturer directions.
3) Make the brine
In a saucepan, combine vinegar, water, and pickling salt. Bring to a boil, stirring until salt dissolves. Keep it hot.
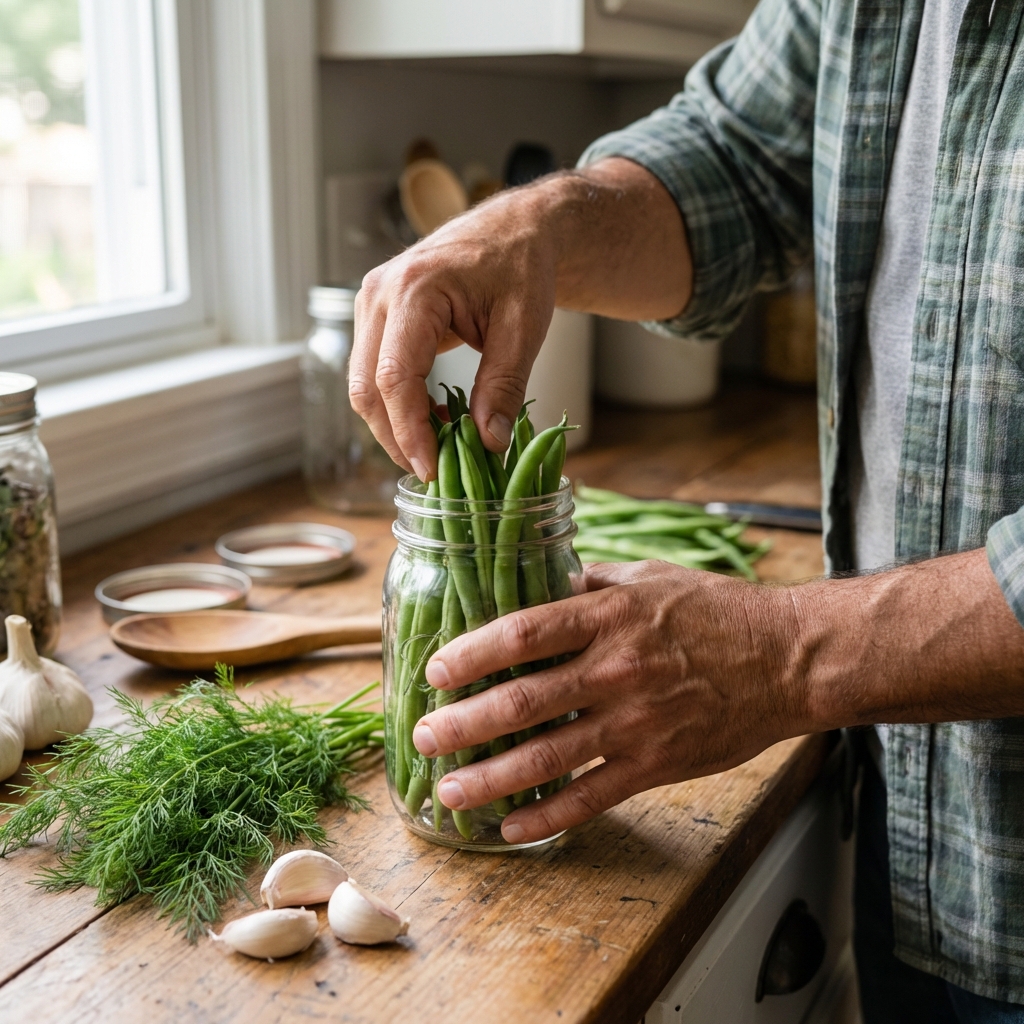
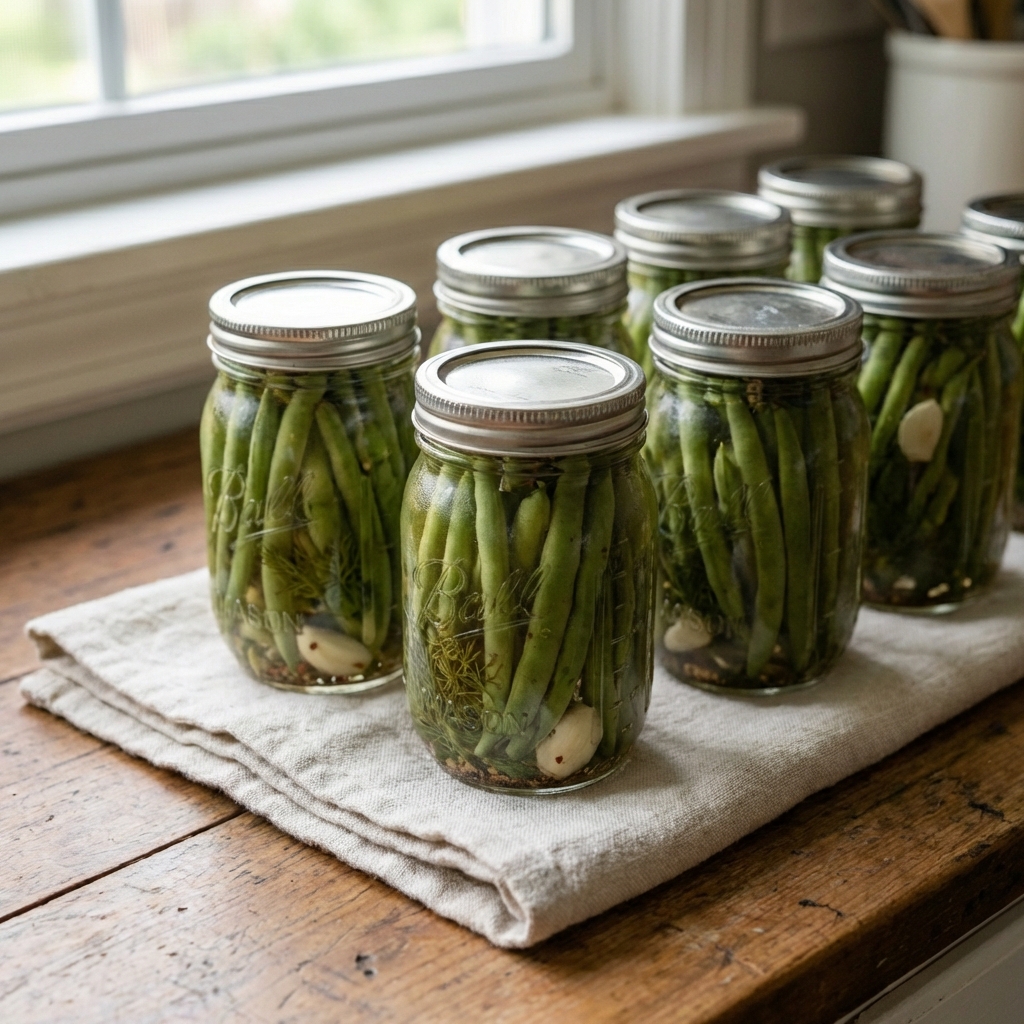
4) Pack the jars
Add garlic, dill seed or fresh dill, mustard seed, and red pepper flakes (if using) to each hot pint jar. Pack beans upright fairly tightly, but do not crush them.
5) Add hot brine
Pour hot brine over beans, leaving 1/2 inch headspace. Remove air bubbles with a bubble remover or chopstick, then re-check headspace and top off with brine if needed.
6) Wipe rims, apply lids, and process
Wipe jar rims clean, apply lids, and screw rings on fingertip-tight.
Place jars in the canner. Now add more hot water if needed so the jars are covered by at least 1 inch of water. Bring the canner to a full boil and maintain a steady boil for the entire processing time.
Process pint jars in a boiling water bath for the time below. Start timing when the water returns to a full boil. Adjust for altitude as needed.
- 0 to 1,000 ft: 10 minutes
- 1,001 to 3,000 ft: 15 minutes
- 3,001 to 6,000 ft: 20 minutes
- Above 6,000 ft: 25 minutes
7) Cool and check seals
Turn off heat and let jars rest in the canner for 5 minutes. Remove jars and cool undisturbed for 12 to 24 hours. Check seals, remove rings, label, and store.
How long until they taste good?
Dilly beans are edible as soon as they are cool, but they are much better after the flavors settle. Give them at least 1 to 2 weeks for a good pickle flavor. If you used fresh dill heads and garlic, the flavor often improves even more after about a month.
Keeping them crunchy
- Start with young, firm beans. Big, older pods tend to soften.
- Pack hot jars, use hot brine, and process the correct time. Over-processing is a common reason for soft beans.
- Trim cleanly. Ragged ends can make jars look cloudy and can soften faster.
- Optional: Add 1/8 teaspoon calcium chloride (often sold as Pickle Crisp) per pint for extra crunch. It is a texture aid, not a substitute for proper vinegar.
Easy flavor variations
These tweaks do not change the vinegar ratio, so they are generally considered safe adjustments for flavor.
- Spicy dilly beans: Add 1 small dried chili or 1/4 teaspoon red pepper flakes per pint.
- More garlic: Use 2 to 3 cloves per pint if you love garlic.
- Pickle spice version: Add 1/4 teaspoon pickle spice per pint.
- Onion: Add a few thin slices of onion to each jar for a “deli pickle” vibe.
What not to change for canning: Do not reduce vinegar, do not add extra low-acid vegetables in large amounts, and do not thicken the brine.
Troubleshooting
My dilly beans are soft
- Beans were older or overgrown
- Processing time was too long or jars boiled too aggressively
- Jars cooled too slowly in a very hot kitchen
They are still fine to eat if sealed and processed correctly, just less crunchy.
The brine looks cloudy
- Usually caused by table salt with additives or hard water
- Spices can also add a little haze
Cloudiness is not automatically a safety issue. Discard if the jar is unsealed, leaking, foamy, moldy, spurting when opened, actively bubbling when undisturbed, or if anything smells off.
Some beans are floating
A little float is common as the beans relax. Pack tighter next time and make sure you remove air bubbles before processing.
Storage and serving
Storage: Store sealed jars in a cool, dark place. For best quality, use within 1 year. Refrigerate after opening and use within 3 to 4 weeks.
Serving: Dilly beans are great straight from the jar, chopped into potato salad, tucked next to a sandwich, or used as a stir stick for Bloody Marys.
Best beans to use
Snap beans are the classic choice. Bush beans are easy because they tend to ripen in a big wave, which matches canning day. Pole beans work too if you keep up with picking. Either way, aim for beans that are slender and firm, not lumpy with big seeds inside.
Printable recipe card
Dilly Beans (Pint Jars)
Yield: About 4 pints
Use: Pint jars only for this timing (follow a tested process for quarts)
Brine: 2 1/2 cups 5% vinegar + 2 1/2 cups water + 1/4 cup pickling salt, bring to a boil
Per pint jar: 1 to 2 garlic cloves, 1 tsp dill seed or 1 dill head, 1/2 tsp mustard seed (optional), pepper flakes to taste (optional), green beans packed upright
Headspace: 1/2 inch
Process: 10 minutes (0 to 1,000 ft), 15 minutes (1,001 to 3,000 ft), 20 minutes (3,001 to 6,000 ft), 25 minutes (above 6,000 ft). Keep jars covered by at least 1 inch of boiling water.

Jose Brito
I’m Jose Britto, the writer behind Green Beans N More. I share practical, down-to-earth gardening advice for home growers—whether you’re starting your first raised bed, troubleshooting pests, improving soil, or figuring out what to plant next. My focus is simple: clear tips you can actually use, realistic expectations, and methods that work in real backyards (not just in perfect conditions). If you like straightforward guidance and learning as you go, you’re in the right place.