Rats are not a “wait it out” problem. Once they find steady food and a safe hiding spot, they settle in fast and multiply faster than most people expect. The good news is you do not need fancy gadgets to get results. You need a plan you can follow: confirm you have rats, cut off what is attracting them, trap consistently, then seal entry points and keep things unfriendly for new arrivals.
This DIY guide is written for beginners and focuses on methods that work in real homes, garages, sheds, and backyards.
First, make sure it’s rats (not mice)
Rats and mice overlap, but the size difference matters because it affects trap choice and where you place them.
- Droppings: Rat droppings are larger, commonly about 12 to 20 mm (about 1/2 to 3/4 inch). Mouse droppings are smaller, often 3 to 6 mm (about 1/8 to 1/4 inch). Note: young rats can leave smaller droppings, so use more than one clue.
- Noises: Rats are heavier. You may hear thumps or heavier scurrying, especially at night.
- Gnaw marks: Rats leave bigger chew marks and can damage plastic bins, wood, and even soft metals like aluminum.
- Burrows: Outdoor rats often dig burrow holes near foundations, sheds, compost piles, or dense groundcover.
- Runways: Rats create “paths” along walls and fences. You might see greasy rub marks on baseboards or along pipes.
If you are seeing larger droppings, burrows, and a strong ammonia-like odor, treat it as a rat problem.
Safety basics before you start
Rats can carry diseases, and droppings and urine are the bigger risk than the rat itself. Keep it simple and safe.
- Wear disposable gloves and a mask when cleaning droppings, nesting material, or handling traps.
- Do not sweep or vacuum dry droppings. Mist with disinfectant first, wait a few minutes, then wipe up with paper towels.
- Wash hands well after any cleanup or trap handling.
- If you find heavy droppings in an enclosed space (attic, crawlspace), consider calling a pro for safe cleanup.
The beginner plan that works
Step 1: Remove the buffet (food and water)
Traps work better when rats are hungry, and prevention works better when there is nothing worth returning for.
- Pet food: Feed pets at set times and remove bowls and uneaten food right away. Store food in a sealed metal container or thick plastic with a tight lid (rats can chew some plastics).
- Bird feeders: Pause feeding for 2 to 4 weeks or switch to a no-mess seed and use a tray. Clean spilled seed daily.
- Fruit trees and gardens: Pick up fallen fruit and vegetables. Harvest ripe produce promptly.
- Trash: Use tight-fitting lids. Rinse containers. Do not let bags sit outside the can.
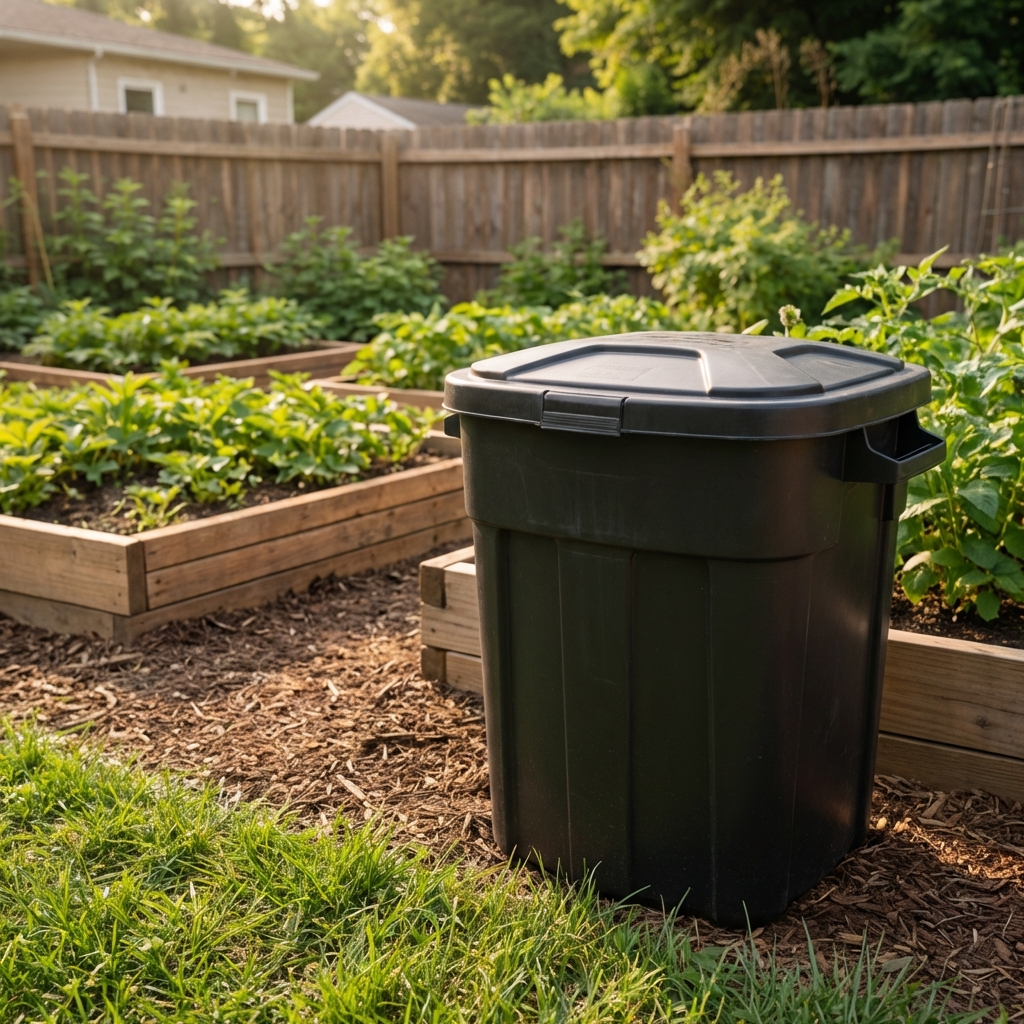
- Compost: Avoid meat, grease, and cooked foods. Use a rodent-resistant bin if possible.
- Water: Fix leaky spigots. Empty standing water in trays and buckets.
Step 2: Reduce hiding spots (shelter)
Rats love cover. If your yard has lots of low, dense hiding places, it becomes a safe highway.
- Trim tall weeds and grass, especially along fences and building edges.
- Keep shrubs pruned up so you can see underneath.
- Stack firewood at least 18 inches off the ground and about a foot away from walls if you can.
- Clean clutter in garages, sheds, and under decks.
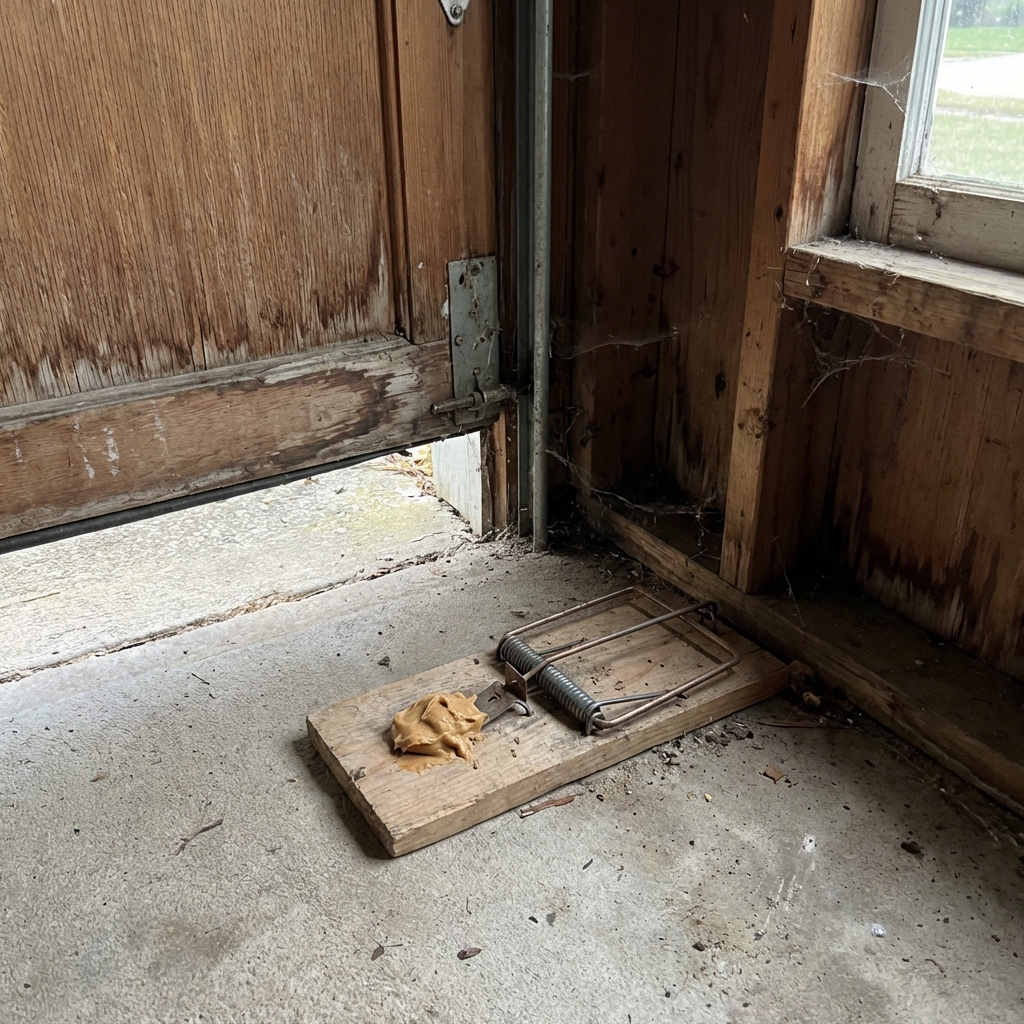
Step 3: Trap consistently (the action step)
For most homeowners, snap traps are the most beginner-friendly choice because they are effective, inexpensive, and avoid the risks that come with poison.
Best trap types (and when to use them)
- Snap traps (recommended): Fast and effective when placed correctly. Use traps labeled for rats, not mice.
- Enclosed snap traps: Helpful if you have pets or kids, or you want a cleaner setup.
- Electronic traps: Can work well indoors, but cost more and need batteries.
- Live traps: Not the best choice for beginners. Rats are strong, stressed, and can bite. Also, relocation is illegal in some areas and humane dispatch may be required. Check local rules first.
Where to place traps (this is the make-or-break)
Rats avoid open areas. They travel along edges like walls, fences, and stored items. Place traps where rats already feel safe.
- Set traps tight to a wall with the trigger side facing the wall.
- Place along known runways, behind appliances, in garage corners, and near droppings.
- Use multiple traps. For rats, one trap is rarely enough. Start with 4 to 12 depending on the space and signs.
- Handle traps with gloves and avoid touching bait with bare hands.
Bait that works
Simple is fine. Use a pea-sized amount so they have to work the trigger.
- Peanut butter (classic)
- Nutella or chocolate spread
- Bits of dried fruit
- Bacon grease (use sparingly)
If traps are ignored
- Try pre-baiting: Leave traps unset with bait for 1 to 2 nights, then set them once feeding is obvious.
- Reduce competing food: Even small crumbs, pet bowls, or bird seed can make traps feel optional.
- Adjust placement: Move traps tighter to edges and closer to fresh droppings or rub marks.
Check, dispose, and disinfect
- Check traps daily (more often if you have pets).
- Wear gloves for disposal. Place the rat and trap contents into a plastic bag, seal it, then double-bag and put it in an outdoor trash can with a tight lid.
- Disinfect the trap area and any surfaces with droppings or urine. This helps with sanitation and can reduce odor trails that encourage repeat traffic.
How long it should take
If your trap placement is right and food sources are under control, you often see results within a few nights. With trap-shy rats or heavier activity, it can take a week or more. Keep trapping until you have 7 to 10 days with no new droppings, no new gnawing, and no trap activity.
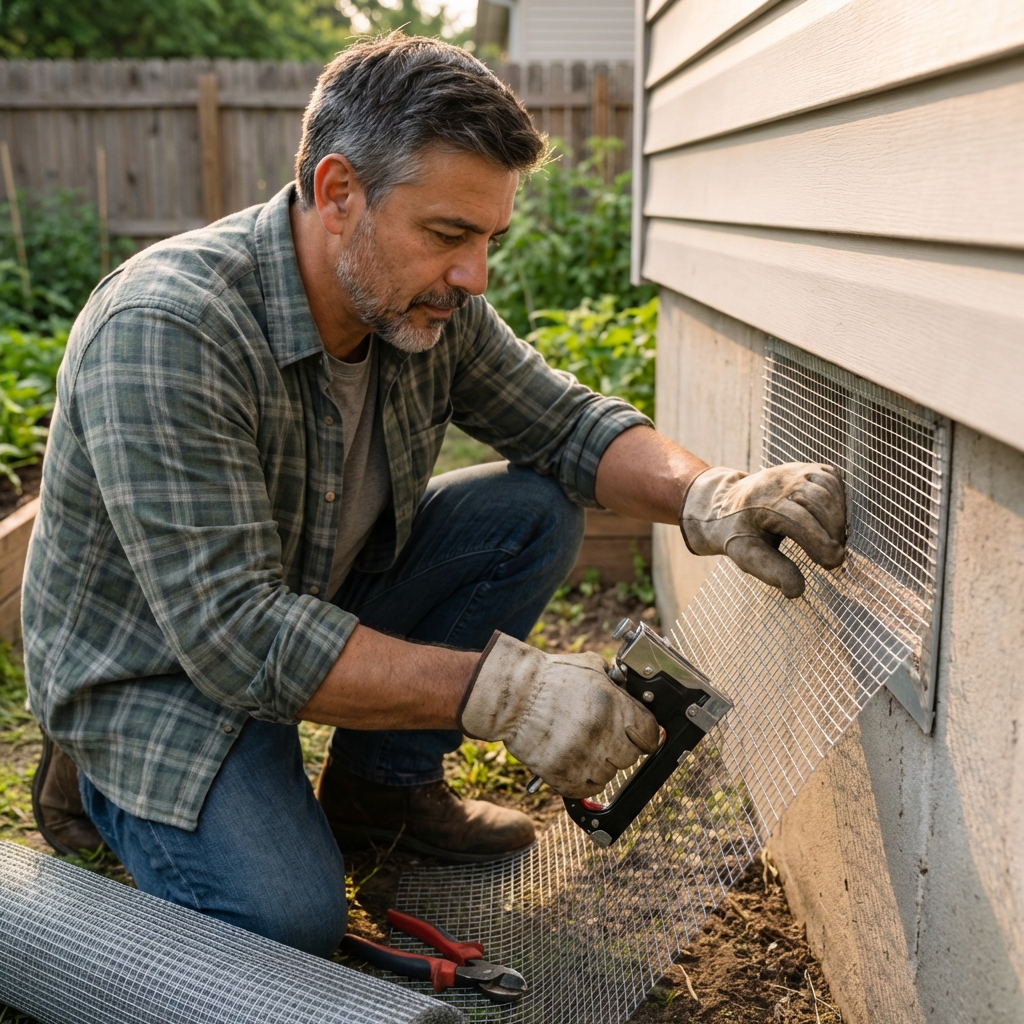
Step 4: Seal entry points (exclusion)
If you skip this step, you can trap rats all week and still have new ones moving in. In most situations, start trapping first, then seal once activity is clearly dropping so you do not trap rats inside. One exception: if you have an obvious exterior gap that you are confident is not being used as an active exit route from inside the house, sealing it right away can be fine.
What to look for: gaps under doors, holes where pipes enter walls, torn vents, damaged crawlspace screens, chimney and roof vents, and cracks in foundations. Also look up: rats can reach roofs via tree limbs, fences, and utility lines.
- Door gaps: Install a door sweep and repair rotted thresholds.
- Pipe gaps: Fill with steel wool and cover with metal flashing or a cement-based patch.
- Vents: Cover with strong, corrosion-resistant (galvanized) hardware cloth, firmly fastened to the frame. 1/4-inch mesh is a solid default for rodent-proofing. For larger vents, use sturdy mesh and proper framing so it stays secure.
- Roof and chimney openings: Screen roof vents and chimneys with appropriate caps or heavy-gauge mesh designed for that use.
- Burrows near foundations: Collapse them after trapping is working, then block access and reduce nearby cover.
Measured guidance beats guesswork: rats can squeeze through openings around 1/2 inch or larger. If you can fit the tip of your pinky into a gap, measure it and treat it as suspicious.
Why I recommend avoiding poison in most home setups
Rodent bait (poison) can sound easier, but it often creates new problems.
- Secondary poisoning: Predators and pets can be harmed if they eat poisoned rodents. Proper use lowers the risk, but it does not erase it.
- Smell: Rats may die in walls, crawlspaces, or under decks.
- Ongoing attraction: If the environment still has food and shelter, rats return.
If you choose bait stations, use tamper-resistant stations, follow the label exactly, and follow local regulations. For many beginners, traps plus exclusion is the cleaner, safer path.
Outdoor rats in the garden: what to do
Garden rats usually show up for three reasons: fallen fruit, compost, and cover. Here is the fastest way to swing things back in your favor.
- Clean harvest habits: Pick up dropped fruit daily during peak season.
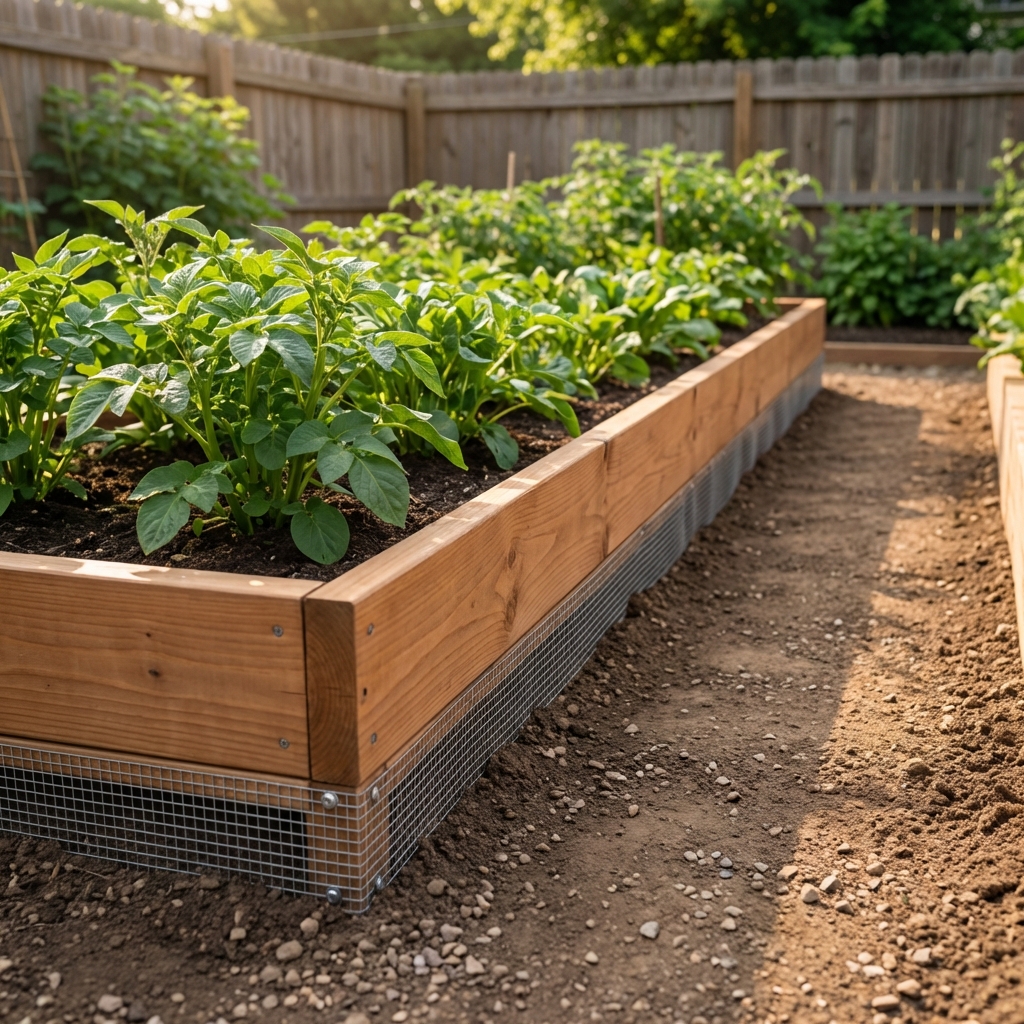
- Protect beds: Use 1/2-inch hardware cloth at the bottom of raised beds if burrowing is a problem.
- Secure compost: Closed bin, no cooked scraps, keep the area tidy.
- Thin the jungle: Reduce groundcover and keep a clear strip along fences and structures.
- Trap along fences: Place rat snap traps inside protective boxes if pets are around.
Common beginner mistakes
- Setting traps in the middle of the room: Rats prefer edges and cover.
- Using too few traps: One trap cannot keep up with a real rat problem.
- Leaving food out: Pet bowls, bird seed, and open trash make trapping harder.
- Not sealing entry points: You end up trapping “forever” because new rats keep arriving.
- Sealing too early: If you seal everything before trapping, you can trap rats inside and make the problem worse.
When to call a professional
DIY works well for light to moderate activity, but some situations need experienced help.
- Rats in walls, attic, or crawlspace with heavy droppings
- You see rats during daylight (often means high population or pressure)
- Multiple burrows around the foundation
- You have young children, immunocompromised family members, or high-risk cleanup areas
- You have tried trapping for 2 weeks with no improvement
Quick checklist you can follow tonight
- Pick up pet bowls and uneaten food, bird seed, and fallen fruit.
- Clean obvious droppings safely (mist, disinfect, wipe).
- Set 4 to 8 rat snap traps along walls where you see signs.
- Mark and photograph entry points to seal once trapping is working.
- Check traps daily, reset as needed, and keep the area tidy.
Stick with the process. Rats are persistent, but they are also predictable. When you remove easy food, reduce cover, trap along their travel routes, and seal the openings they use, you usually win faster than you think.

Jose Brito
I’m Jose Britto, the writer behind Green Beans N More. I share practical, down-to-earth gardening advice for home growers—whether you’re starting your first raised bed, troubleshooting pests, improving soil, or figuring out what to plant next. My focus is simple: clear tips you can actually use, realistic expectations, and methods that work in real backyards (not just in perfect conditions). If you like straightforward guidance and learning as you go, you’re in the right place.